Posted by Seeka SkyPaperScissors
on June 24, 2021

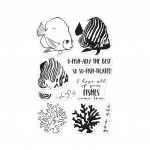
Hello and welcome! Seeka here and today I'm sharing a shaker card featuring the Color Layering Royal Angelfish from the new Summer Catalog. I love how easily this dimensional little fish comes together!

I started off by stamping the outline layers of the fish and three coral pieces in Intens-ified Black Ink onto Dove White cardstock. Next, I stamped the additional layers of the fish, starting with the layer of yellow and orange stripes. I first fully inked the stamp in Dandelion Bold Ink and stamped down. Then I selectively inked just the bottom of the stamp in Tangerine Bold Ink, used a rag to dab at and soften the harsh edge of ink in the middle of the stamp, and then stamped again. I repeated this once more, this time using just a bit of Crimson Bold Ink at the very edge of the fish's belly. Next, I used the other layering stamp, inked up in Ocean Dye Ink, to stamp the other set of stripes.
For the coral, which just has a single layer, I stamped all three pieces in Tangerine and then used some selective inking with Crimson to create a bit of color variation on two of the pieces. With the stamping completed, I used the coordinating dies to cut out the images and then set them aside.

The background is one that I made using Distress Paints. I dropped a few drops of several aqua colors onto a non-stick work surface, misted the drops as well as a 4.25" x 5.5" panel of Dove White cardstock with clean clear water, and then dragged the panel through the paint. I used a heat tool to quickly dry the panel and then dabbed the panel at the remaining paint which created the additional dots and texture. When the panel was dry, I stamped the sentiment and then set the panel aside.
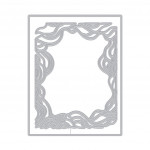
Next, I used the Swirling Tide Border Die With Frame to cut a piece of Dove White cardstock. On the back of the resulting frame, I added double-sided adhesive tape around the border and then, after removing the tape's release paper, adhered an Acetate Card Panel. Next, and still working on the back of the frame, I added a double layer of foam tape strips around the border of the acetate.

With the frame still facing downwards, I poured some Seashore Sequin Mix into the center of the frame and then removed the release paper of the foam tape and adhered the watery background. To finish the card, I tucked in and adhered two pieces of coral between the frame and the piece of acetate, and then adhered the fish and final piece of coral with foam tape over top. And finally, I adhered the card front to a card base.
Thank you so much for visiting!

|
























































































3 comments
I absolutely adore this and the teal back ground is gorgeous!
Fabulous card Seeka, I love that you made a shaker from this beautiful die.
Gorgeous use of colours.
Thank you so much for sharing, stay safe and have a wonderful day.
Thank you for your detailed tutorial on how you created this amazing card! What a wonderful collection Hero Arts put together, and your design and color choices bring it to life!