
Candlewick Sampler Inspiration | CAS Romantic Cards with Carolyn Peeler
on September 14, 2019

Candlewick Sampler Inspiration | CAS Romantic Cards with Carolyn Peeler

Hi there, my name is Carolyn Peeler. I’m a former scrapbooking product designer who now hosts creative women’s retreats in Tuscany, Italy. I love keeping my foot in the paper crafting world through cardmaking, so a huge thank you to the Spellbinders team for reaching out to me. I am excited to share my clean and simple take on the beautiful Candlewick Sampler collection by Becca Feeken.

Spellbinders - Candlewick Sampler Collection by Becca Feeken - Inspiration | CAS Romantic Cards with Carolyn Peeler

My first card is the ultimate in clean and simple. I reimagined the Lace Card front die set and decided to use the large scalloped outline as the card base. To do this, I die cut the front side, then lined up the score lines and repositioned the die to cut the backside of the card. As you can see the finished result is this beautiful card shape that lends a feminine/romantic look to the card. To decorate the front, I used a small strip from an antique ledger down the left border of the card, then added a narrow strip of bright pink cardstock on top of it. Because I love the homespun touch sewing adds to my paper crafts projects I added a straight stitch on top of this pink strip. Finally, I stamped the flower stamp and greeting front and center. I love how simple, yet feminine, this card turned out to be.

Spellbinders Supplies:

Other Supplies:

White and pink cardstock; The Stamp Market Summer Stems stamp; Catherine Pooler ink in: Garden Party, Sage, It’s a girl, Be mine, Sauna, and Midnight; Vintage ledger page; sewing machine and white thread.
Spellbinders - Candlewick Sampler Collection by Becca Feeken - Inspiration | CAS Romantic Cards with Carolyn Peeler

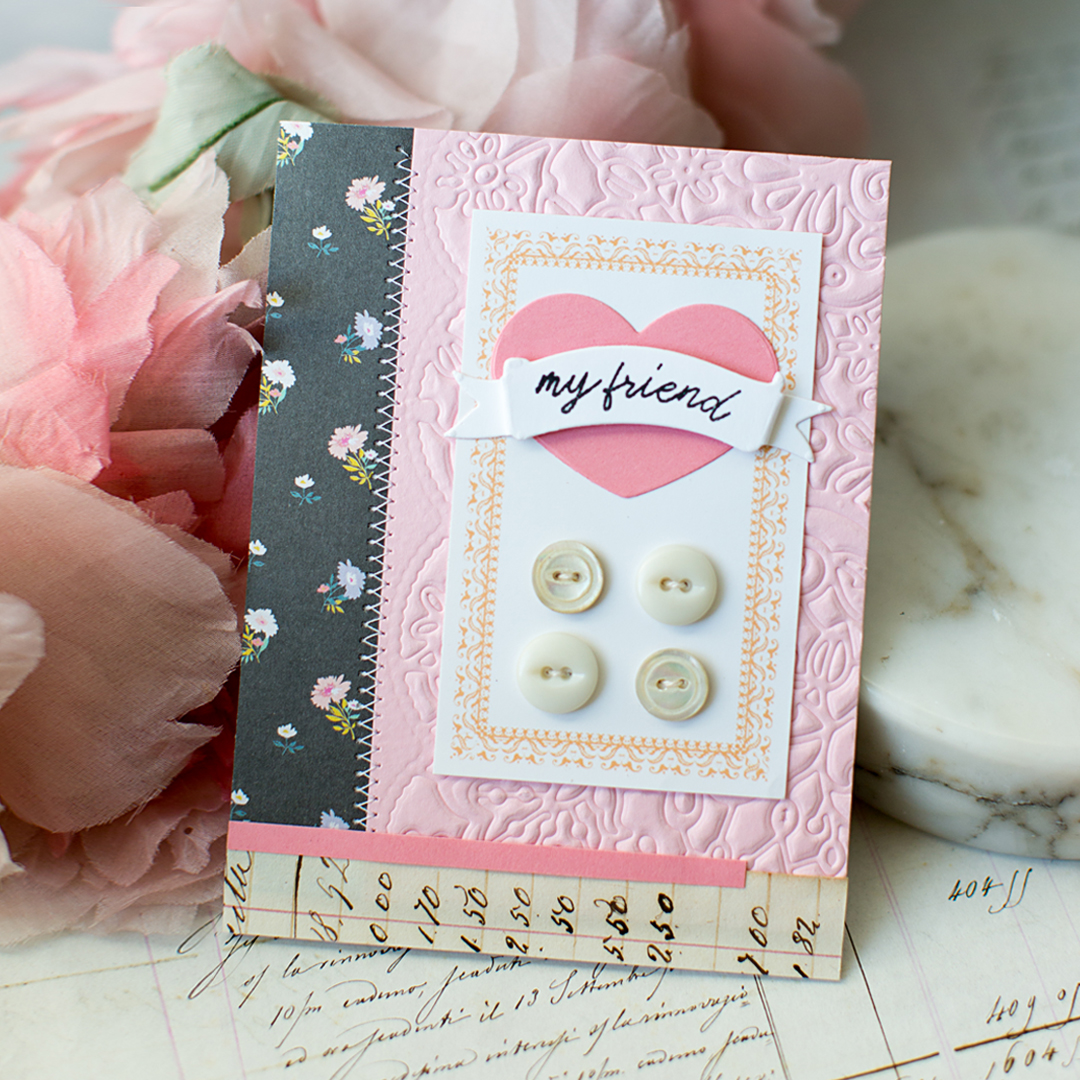
My second card builds on the pink and feminine theme of the first card, but is a bit more intricate. For this one I embossed the inner portion of the Lace Card Front die set onto pink cardstock and used it as the main background paper on my card front. I combined it with a sweet floral paper from the Crate Paper “Bloom” paper pad, some vintage ledger paper and a small strip of darker pink cardstock. I made a faux button card on a little vintage label using the Spellbinders “Just Chillin’” die and stamp set, and some vintage buttons.

Spellbinders Supplies:

Other Supplies:

Light and dark pink cardstock; orange bookplate; assorted white/cream buttons; The Stamp Market Summer Stems stamp; Cathrine Pooler Midnight ink; Crate Paper Bloom 6x6 paper pad.
Spellbinders - Candlewick Sampler Collection by Becca Feeken - Inspiration | CAS Romantic Cards with Carolyn Peeler

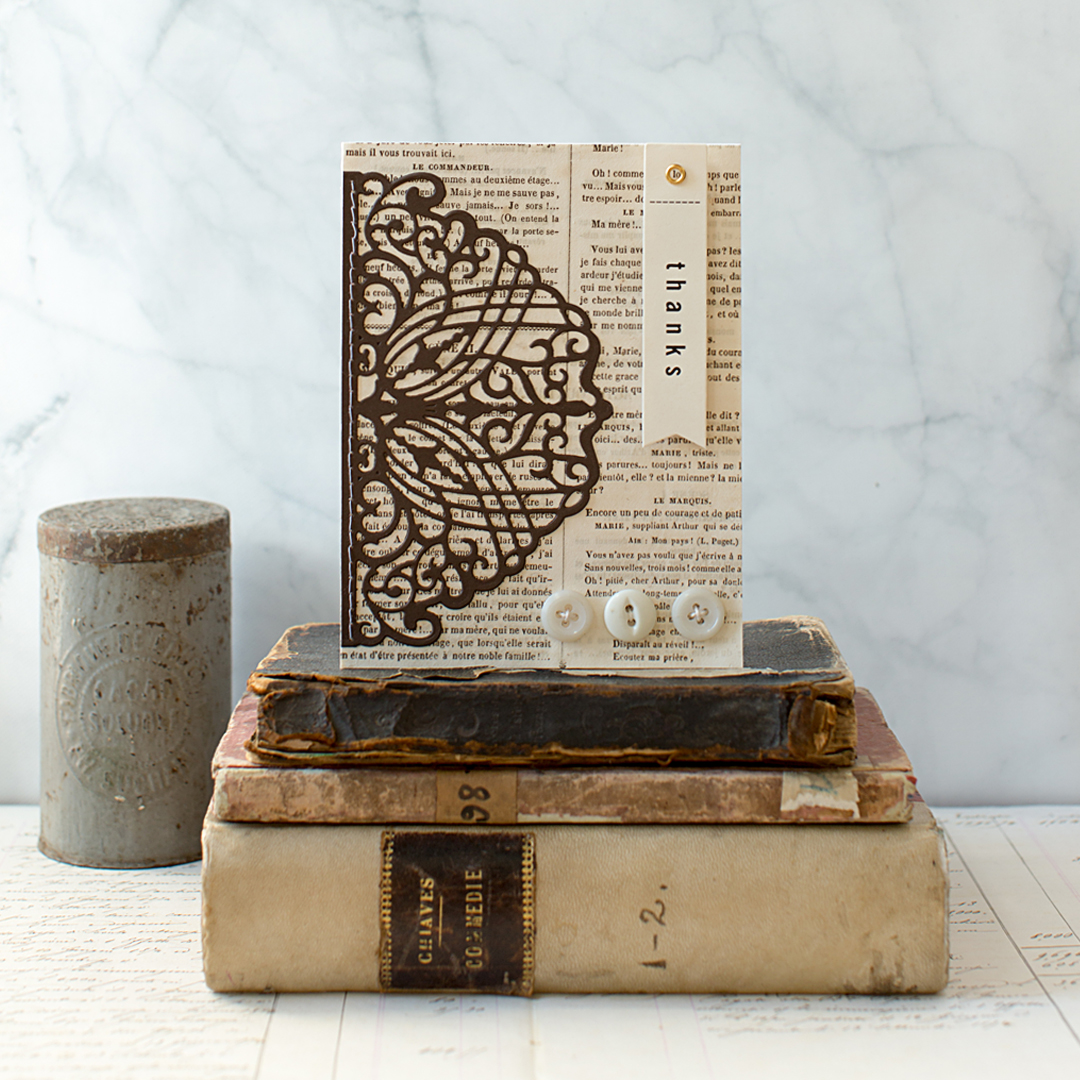
For my third project with the Candlewick Sampler collection I departed from the pink theme and chose to lean a bit more vintage/masculine and so broke out the vintage book paper and the delicate Colonnade Border die. By choosing vintage paper as the background for the card, it gives a beautiful old world feeling to the card and the dark brown die cut really pops from the page.

Spellbinders Supplies:

Other Supplies:

Brown cardstock, Vintage book page; assorted white/cream buttons; American Crafts thank you banner; 3d adhesive I frequently like to use old ephemera in my paper crafting projects, as I did on these cards, but I know that not everyone has access to similar items. So I have two resources for downloadable/printable ledger paper that I'd love to share with you: The Graphics Fairy, and The Old Design Shop. Both sites have a section full of beautiful ephemera that is free to use. Here, from the Graphics Fairy, is a link to some dictionary paper would work as a great background paper, and from the Old Design Shop, is a beautiful French receipt that would work for the ledger paper. I hope you enjoyed my CAS contributions to the Spellbinder blog today - it’s always such a treat to be invited to share my creativity. I invite you to continue getting to know me, by popping over to my Instagram accounts: @carolynpeeler and @pronetowanderretreats. Happy crafting!

Leave a comment

Your email will not be published. Please note, comments need to be approved before they are published.

1 comment

Surekha Galagoda,

All the cards are beautiful and you sure are a genius.


  • HOW TO USE PRESS PLATES WITH MULTIPLE INKS | CREATE YOUR WAY HOLIDAY, BPR-050, BPI-049, BPI-003

    BP-001

    How to Use Multiple Ink Colors with BetterPress Registration Plates

    Create a colorful Christmas card while learning how to apply multiple ink colors to BetterPress registration plates. In this detailed tutorial, you’ll use the Festive Evergreens Registration Press + Foil Plate & Die Set to press a holiday doorway scene in three colors, combining the built-in registration system with a simple masking technique. The registration template positions the coordinating plates so each layer aligns with...

  • How to Make a Colorful Foiled Butterfly Card with Glimmer II

    BP-351

    How to Make a Colorful Foiled Butterfly Card with Glimmer II

    Combine hot foiling, alcohol-marker coloring, ink blending, and dimensional shaping to create a colorful butterfly card that sparkles from every angle. In this step-by-step tutorial, you’ll learn how to foil detailed butterflies and a floral background with the Glimmer II Hot Foil System, add bold color, and shape the butterfly wings for a realistic raised effect. The Bright Butterflies and Thanks In Bloom Press +...

  • How to Heat Emboss with BetterPress Plates: Snowman Christmas Card

    BP-001

    How to Heat Emboss with BetterPress Plates: Snowman Christmas Card

    BetterPress plates can do more than create letterpress impressions and hot-foiled designs. In this detailed Christmas card tutorial, you’ll learn how to apply clear sticky ink to a BetterPress plate and use white embossing powder to produce a crisp, heat-embossed snowflake background. The tutorial also covers pressing and die cutting a sentiment, assembling three detailed snowmen, and arranging the finished elements on an A2 card....






























