

Posted by Spellbinders Paper Arts
on April 01, 2017

Hi there, Becca Feeken with Amazing Paper Grace here to spread my love of borders. Seriously, borders are normally where my inspiration starts on a card because I'm thinking about the framing or what special element I'm going to use to draw your eye in to the center. For the past couple of weeks I've been showing different frames to give your card that unique something. I'd be remiss if I didn't tell you there are tons of other ways and places you can use the same borders, in fact, today we're going to take them to the edge.
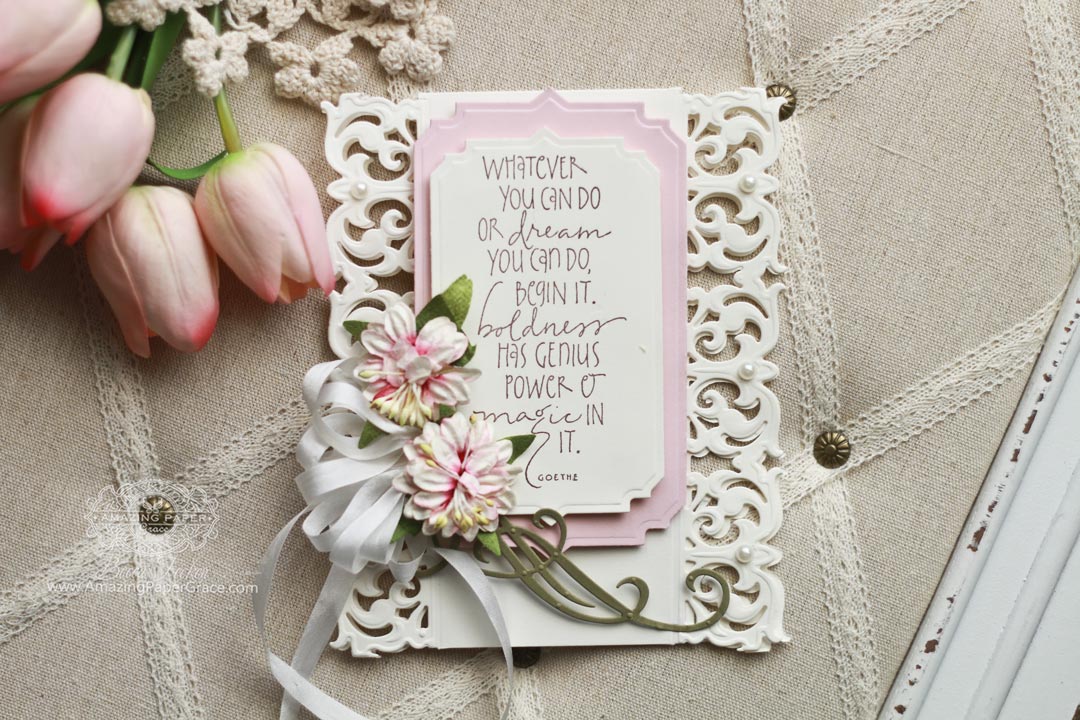
 Taking one of the borders and simply cutting it from each edge of the card -- before assembly the card base -- will give you a shaped card. It's easy, and I'll show you how!
 Instructions:
 1. Cut a cream panel 7" tall by 5" wide and score 1" from top, cut the other cream panel 6" tall by 5" wide.
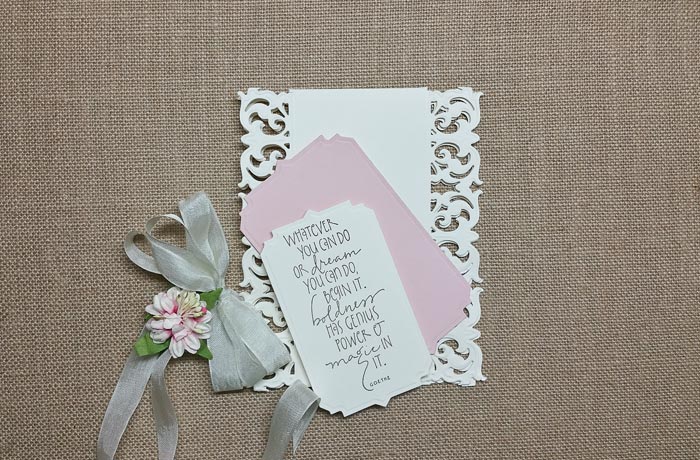
 2. Align S4-707 Graceful Damask Border die along left edge of paper - cut and emboss.
 3. Align S4-707 Graceful Damask Border die along right edge of paper but positioned horizontally on plates such that the previously cut and embossed motif will hang over the edge. Cut and Emboss in this manner.
 4. Do this with both panels and see the results above.
5. Trim the top corners off of the panel with the score line - Adhere one panel to the other using the adhesive along the top.
4. Do this with both panels and see the results above.
5. Trim the top corners off of the panel with the score line - Adhere one panel to the other using the adhesive along the top.
 6. Stamp sentiment on a panel cut with S5-250 Art Deco Astoria Labels Die #4 (smallest die size is #1) in cream and layer it using foam tape with a panel cut using Die #5.
 7. Add a flourish to the flowers using the decorative piece from S6-082 Classic Elegance Label. Finish with ribbon and pearls.
How many of your borders can you take to the edge? Take a fresh look at Graceful Borders and edge out one more lovely way to make cards.
Sending hugs!
Becca Feeken – www.amazingpapergrace.com
7. Add a flourish to the flowers using the decorative piece from S6-082 Classic Elegance Label. Finish with ribbon and pearls.
How many of your borders can you take to the edge? Take a fresh look at Graceful Borders and edge out one more lovely way to make cards.
Sending hugs!
Becca Feeken – www.amazingpapergrace.com
 Spellbinders Supplies:
Other Products Used:
Wordsworth Rubber Stamps, Neenah Class Crest 80lb Smooth Natural White Card Stock. Pink Cardstock, May Arts Silk Ribbon, 3M Foam Tape, Score Board, Ruler, Paper Trimmer, Ribbon, Prima Flowers, Pearls
Spellbinders Supplies:
Other Products Used:
Wordsworth Rubber Stamps, Neenah Class Crest 80lb Smooth Natural White Card Stock. Pink Cardstock, May Arts Silk Ribbon, 3M Foam Tape, Score Board, Ruler, Paper Trimmer, Ribbon, Prima Flowers, Pearls
Instructions:
1. Cut a cream panel 7" tall by 5" wide and score 1" from top, cut the other cream panel 6" tall by 5" wide.
2. Align S4-707 Graceful Damask Border die along left edge of paper - cut and emboss.
3. Align S4-707 Graceful Damask Border die along right edge of paper but positioned horizontally on plates such that the previously cut and embossed motif will hang over the edge. Cut and Emboss in this manner.
4. Do this with both panels and see the results above.
5. Trim the top corners off of the panel with the score line - Adhere one panel to the other using the adhesive along the top.
6. Stamp sentiment on a panel cut with S5-250 Art Deco Astoria Labels Die #4 (smallest die size is #1) in cream and layer it using foam tape with a panel cut using Die #5.
7. Add a flourish to the flowers using the decorative piece from S6-082 Classic Elegance Label. Finish with ribbon and pearls.
How many of your borders can you take to the edge? Take a fresh look at Graceful Borders and edge out one more lovely way to make cards.
Sending hugs!
Becca Feeken – www.amazingpapergrace.com
Spellbinders Supplies:
Other Products Used:
Wordsworth Rubber Stamps, Neenah Class Crest 80lb Smooth Natural White Card Stock. Pink Cardstock, May Arts Silk Ribbon, 3M Foam Tape, Score Board, Ruler, Paper Trimmer, Ribbon, Prima Flowers, Pearls























































































