

Posted by Spellbinders Team
on April 06, 2024

Hello crafty friends! My name is Suzanna Lee. I am a memory keeper who likes to work on various canvases be it a memory planner, layout pages, or albums. I am absolutely thrilled to be a guest on the Spellbinders blog today sharing a couple of layouts that feature the Doodlebug Dot-Stripe Rainbow Petite Prints Paper Pack along with a Spellbinders BetterPress and Die sets.
 Texture and dimension are design features that are frequently on found on my projects; layered paper is one of many great ways to add such texture and dimension.
 For this colorful layout about my joy at having my husband home after 2 weeks of travel, I used the large scalloped frame from the Heartfelt Thanks & Scallops Die to create scalloped rows. I layered those strips using 14 of the 19 colors in the Doodlebug Dot-Stripe Rainbow Petite Prints 12x12" Cardstock Paper Pack! The frame is shorter than the widths of the circle so the strips had to be joined.
 To break up the repetitiveness of the scalloped strips and bring visual interest to them, I used the Butterfly Swirl Press Plate & Die Set with black ink to create butterfly’s that cascade down the page. By only adhering the bodies of the butterflies, there is additional texture and dimension.
 Multi-layered strips were used to create this rainbow heart using one of the hearts from the Heartfelt Thanks dies. The bottoms of the hearts point inwards thus guiding the eyes of the viewer in toward the photo and the focal points of the page.
 Every project needs a little bling or shimmer, right?! Interspersed in the scallop stripes and butterflies are some silver gems, adding to the visual interest and texture of the page.
 For this layout, I opted to use a selection of colors from the Doodlebug Dot-Stripe Rainbow Petite Prints 12x12" Cardstock Paper Pack, choosing to work with the holiday-relevant green, orange, and yellows.
 Multiple heart sizes were cut out with the hearts from Heartfelt Thanks & Scallops Etched Dies. I cut out both fronts and backs of the papers providing me with dots and stripes to work with. I layered a few of the different sizes and colors and machine-stitched down the center. This allowed me to “fan” up the edges for some fun dimension!
 Additional texture was added to the page by selectively hand-stitching some of the hearts as well as cutting heart “outlines” with neighboring-sized dies.
 For a little contrast and pop of supplemental color, I used the large scalloped frame from the set to provide a slight frame to the large of the two photos.
Thank you so much for joining me today! If you want to see more of my work you can find me on Instagram, Facebook and my YouTube channel.
For a little contrast and pop of supplemental color, I used the large scalloped frame from the set to provide a slight frame to the large of the two photos.
Thank you so much for joining me today! If you want to see more of my work you can find me on Instagram, Facebook and my YouTube channel.

 Texture and dimension are design features that are frequently on found on my projects; layered paper is one of many great ways to add such texture and dimension.
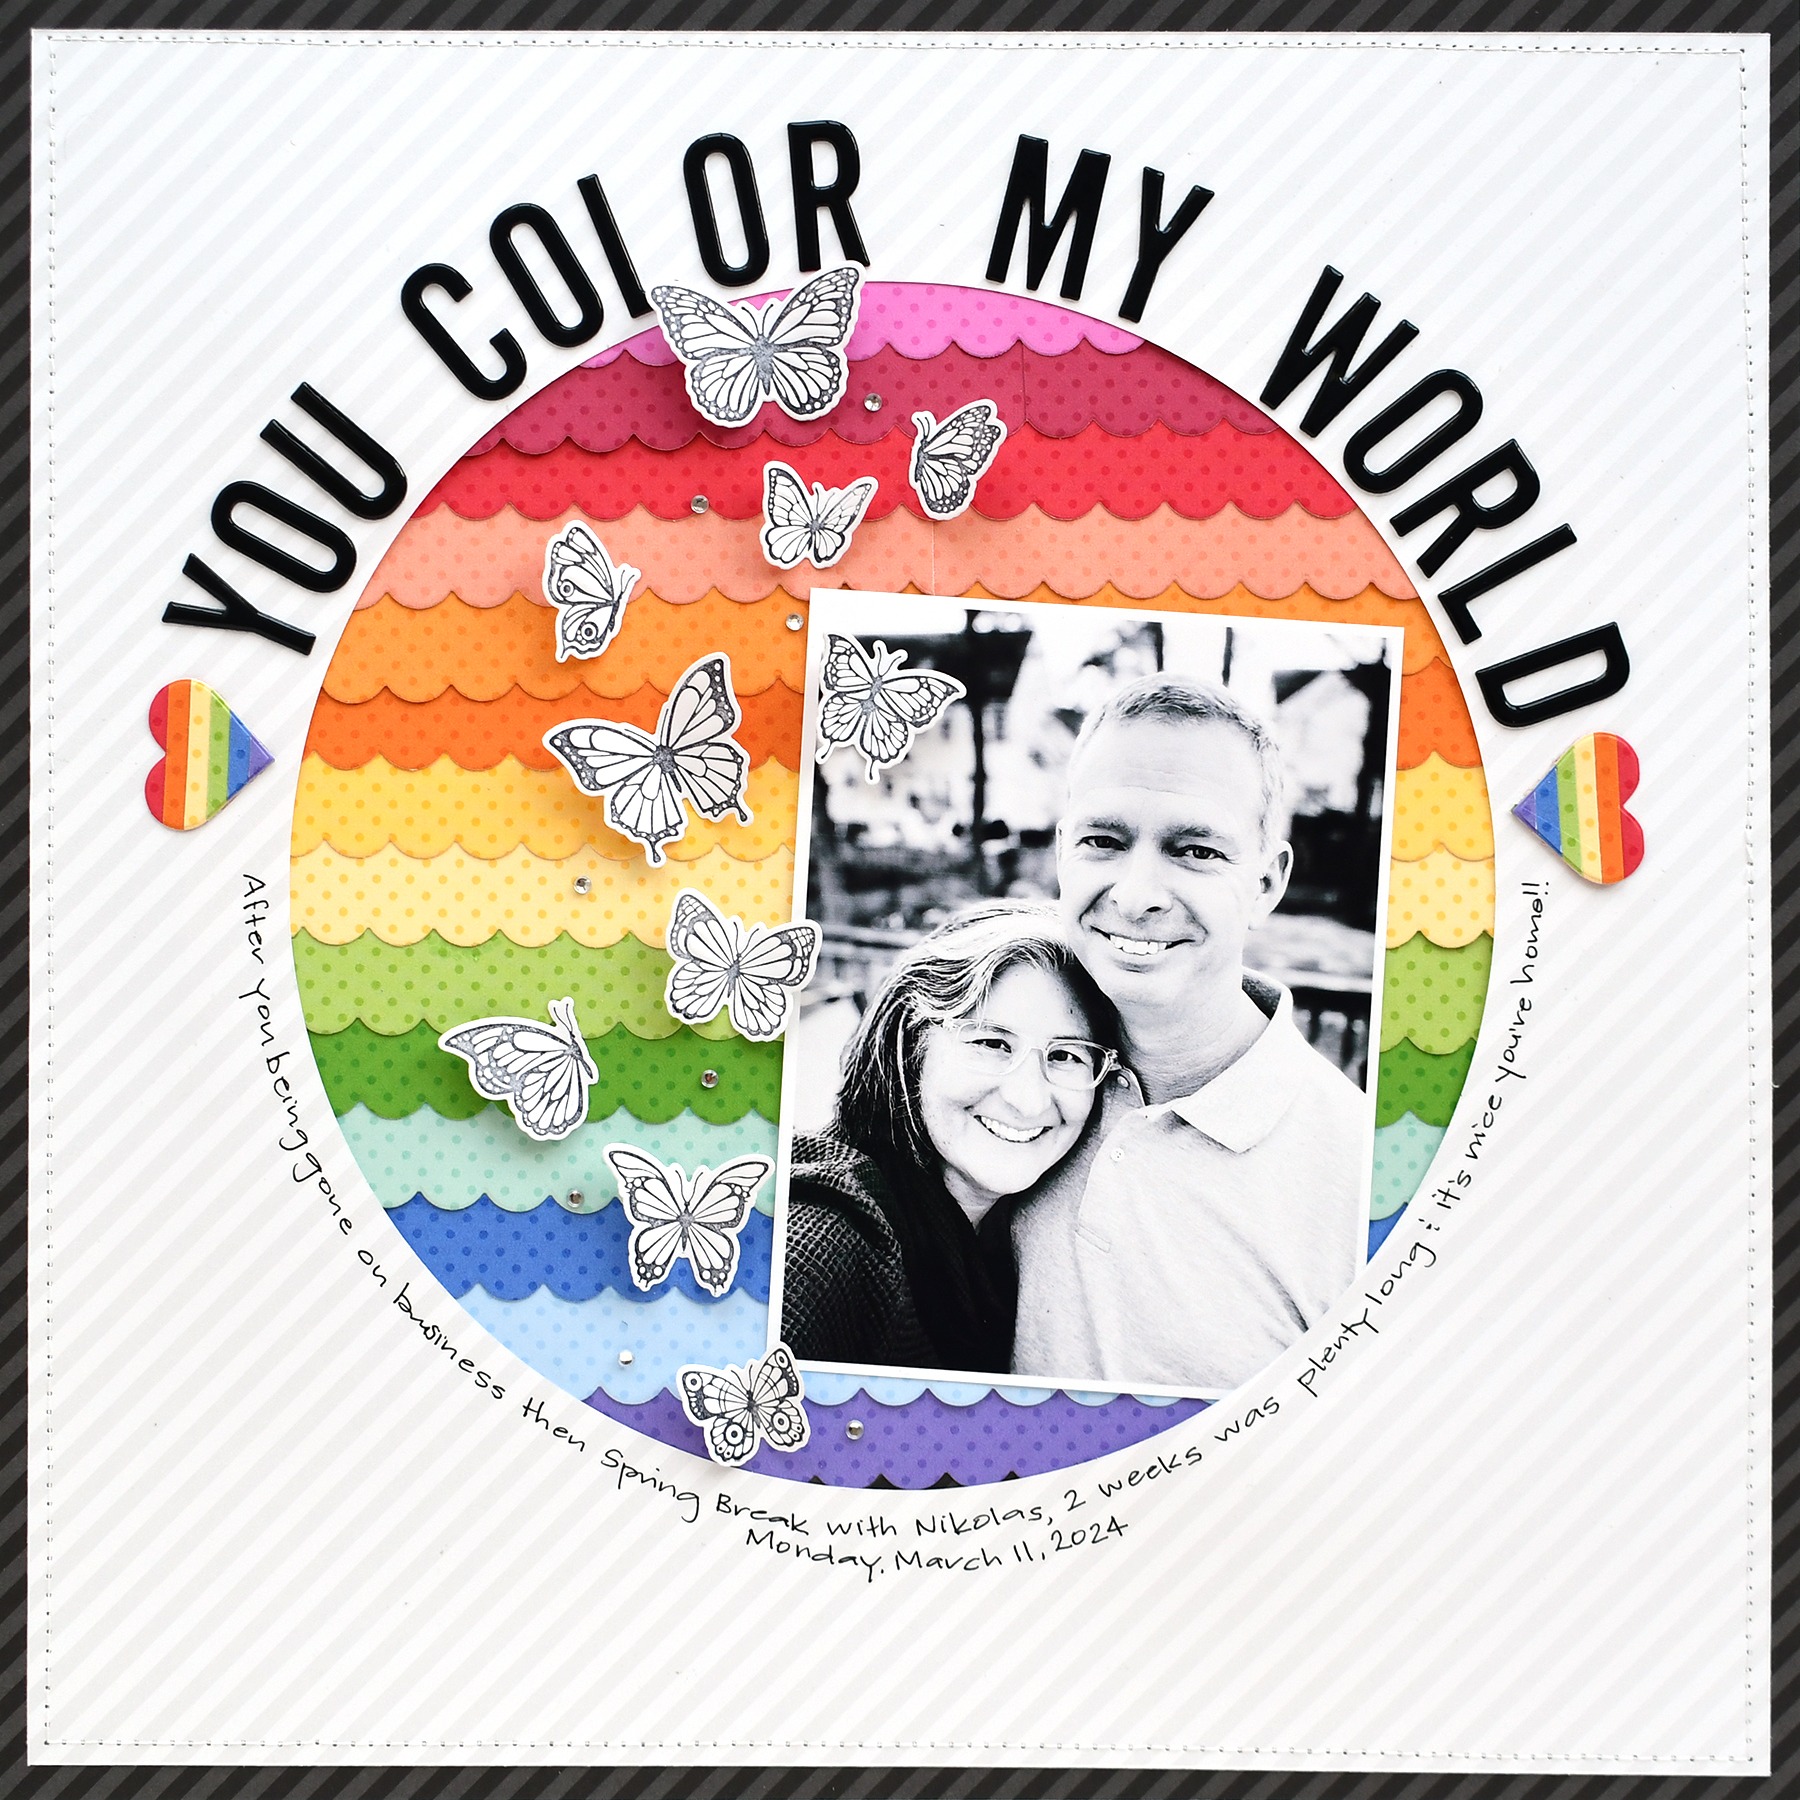 For this colorful layout about my joy at having my husband home after 2 weeks of travel, I used the large scalloped frame from the Heartfelt Thanks & Scallops Die to create scalloped rows. I layered those strips using 14 of the 19 colors in the Doodlebug Dot-Stripe Rainbow Petite Prints 12x12" Cardstock Paper Pack! The frame is shorter than the widths of the circle so the strips had to be joined.
 To break up the repetitiveness of the scalloped strips and bring visual interest to them, I used the Butterfly Swirl Press Plate & Die Set with black ink to create butterfly’s that cascade down the page. By only adhering the bodies of the butterflies, there is additional texture and dimension.
 Multi-layered strips were used to create this rainbow heart using one of the hearts from the Heartfelt Thanks dies. The bottoms of the hearts point inwards thus guiding the eyes of the viewer in toward the photo and the focal points of the page.
 Every project needs a little bling or shimmer, right?! Interspersed in the scallop stripes and butterflies are some silver gems, adding to the visual interest and texture of the page.
 For this layout, I opted to use a selection of colors from the Doodlebug Dot-Stripe Rainbow Petite Prints 12x12" Cardstock Paper Pack, choosing to work with the holiday-relevant green, orange, and yellows.
 Multiple heart sizes were cut out with the hearts from Heartfelt Thanks & Scallops Etched Dies. I cut out both fronts and backs of the papers providing me with dots and stripes to work with. I layered a few of the different sizes and colors and machine-stitched down the center. This allowed me to “fan” up the edges for some fun dimension!
 Additional texture was added to the page by selectively hand-stitching some of the hearts as well as cutting heart “outlines” with neighboring-sized dies.
 For a little contrast and pop of supplemental color, I used the large scalloped frame from the set to provide a slight frame to the large of the two photos.
Thank you so much for joining me today! If you want to see more of my work you can find me on Instagram, Facebook and my YouTube channel.
For a little contrast and pop of supplemental color, I used the large scalloped frame from the set to provide a slight frame to the large of the two photos.
Thank you so much for joining me today! If you want to see more of my work you can find me on Instagram, Facebook and my YouTube channel.
Spellbinders Supplies:
























































































