
Cut & Emboss Folders Inspiration | Blessings Card with Ilina
on July 27, 2018

Cut & Emboss Folders Inspiration | Blessings Card with Ilina

Hello everyone. Ilina Crouse here today. I am honored to be guest designing for Spellbinders and showing you a project using the new Cut & Emboss Folders.  If you are not familiar with these, they are amazing. They cut and emboss at the same time!!!! (hence their name). I was very intrigued when I saw them and had to play with them immediately. They give very nice and crisp embossed image and at the same time cut parts of it. It's like a multitasking embossing folder.
Spellbinders Cut & Emboss Folders Inspiration | Blessings Card with Ilina #spellbinders #neverstopmaking

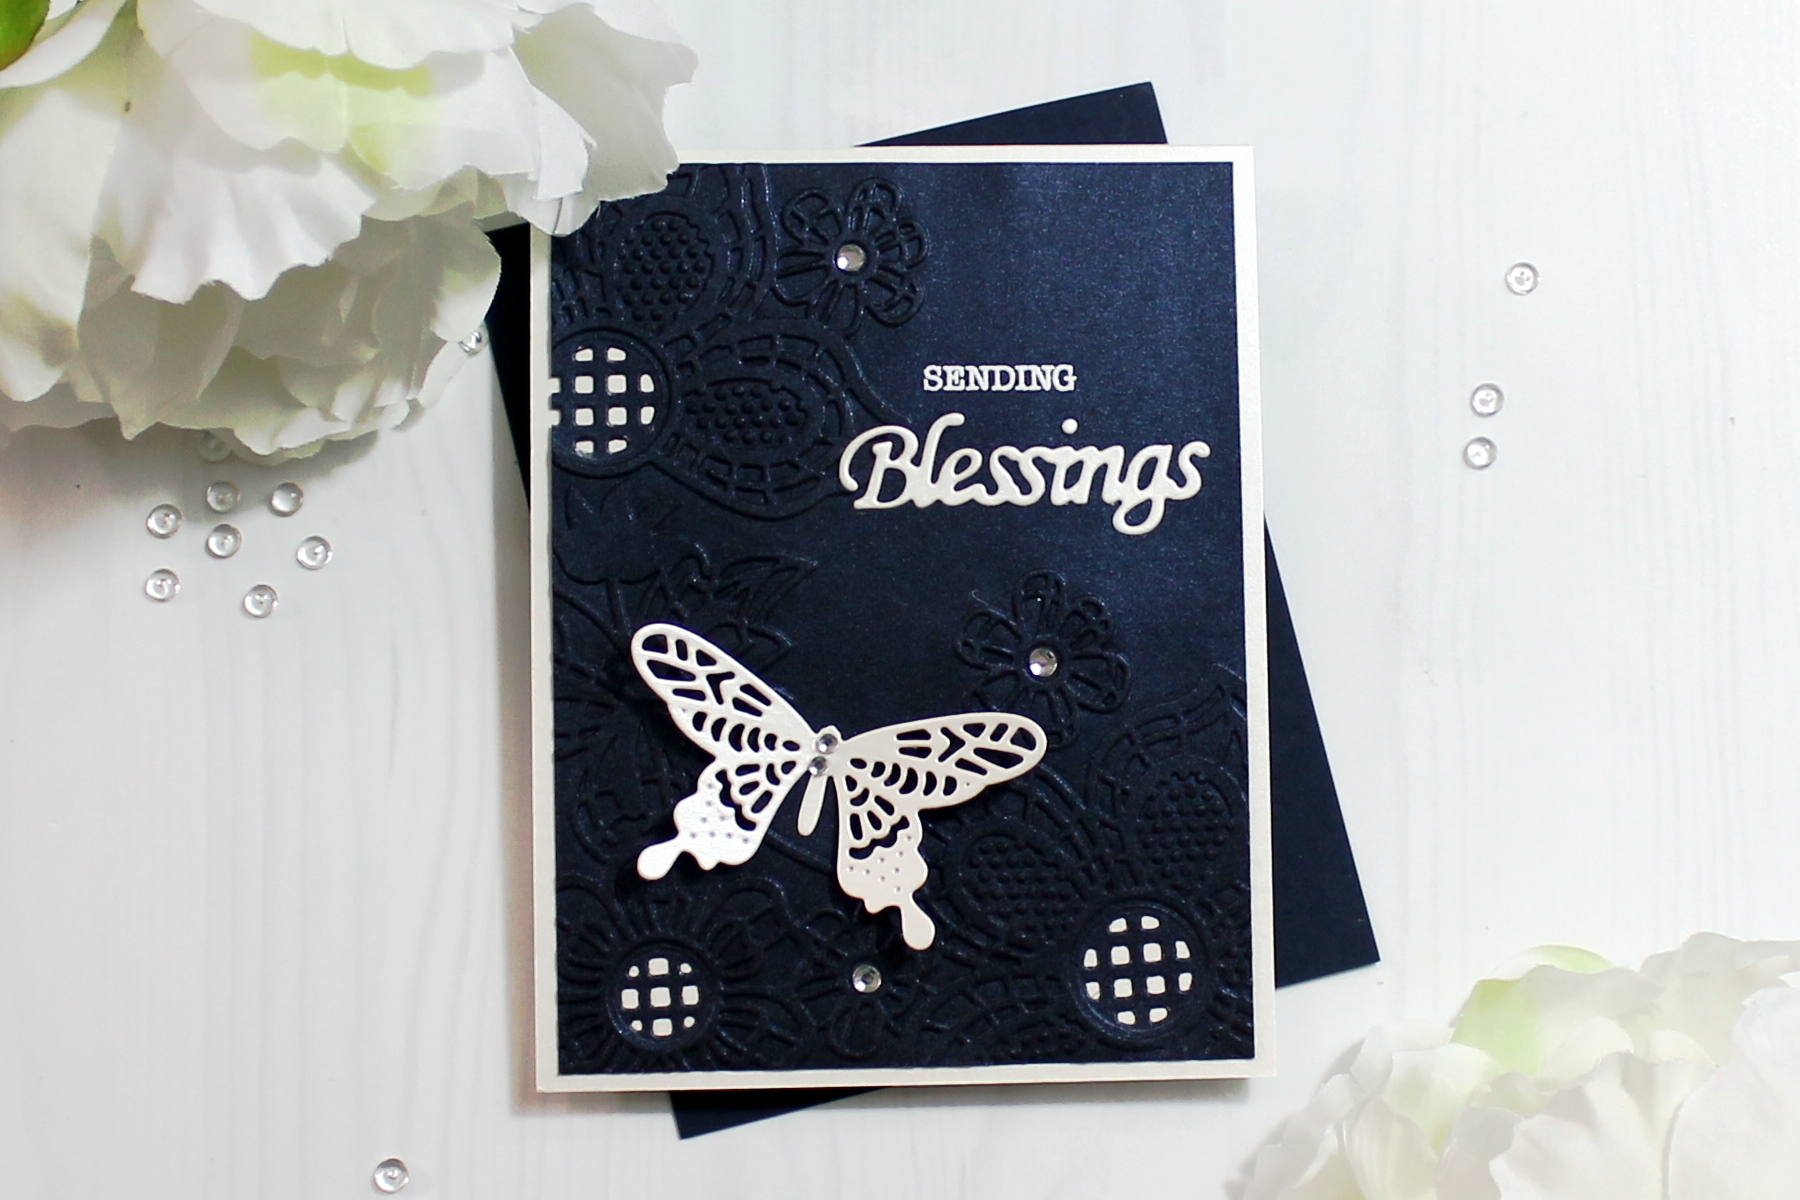
For my card today I used the Floret Cluster Cut and Emboss folder to emboss (and cut) piece of shimmer navy card stock. I wanted to keep my card simple but with interest, so I used shimmer card stock. Once I ran it through my die cutting machine I cut the panel down to 4" x 5 1/4" and set it aside. Using cream shimmer card stock I die cut a butterfly from the Wandering Butterflies dies and the Blessings sentiment from the Blessings Vine Frame dies. Applied adhesive on the back and adhered to the navy panel. Next I stamped the sentiment "sending" above blessings and embossed using white embossing powder.

Spellbinders Cut & Emboss Folders Inspiration | Blessings Card with Ilina #spellbinders #neverstopmaking

To make the card I created top folding note card using the same shimmer cream card stock. Adhered the navy panel to it and added rhinestones to finish it off.

Spellbinders Supplies:

Other supplies: Paper Source cream shimmer card stock, Navy shimmer Card stock, Versamark ink pad, White embossing powder, Rhinestones. Thank you so much for joining me and I hope you are inspired to do something creative today.

Leave a comment

Your email will not be published. Please note, comments need to be approved before they are published.

8 comments

Yana Smakula,

hello Pat,
the sandwich for this embossing folder is the same as for any other regular embossing folder. Please check your machine manual to see what plates/platforms you need to use for it. If you are still having trouble sending it though the machine, please contact our Customer Support Team PHONE: 1-888-547-0400
E-MAIL: customersupport@spellbinders.us

Pat Johnson,

I am having difficulty passing this folder through my Big shot, Can you tell me the sandwich i should be using>
Thankyou

Beverly Jordan,

This is so beautiful and LOVE that you made it in black! Gorgeous designs with the cut out places too!

Denise,

Love the new die cut embossing folders and the great ideas posted.

lorraine turner,

Now I have seen more than one project done with these Spellbinders embossing and cutting folders I really want to have a go myself. Thank you for sharing this with us crafters. :O) xxxx


  • How to Make a Colorful Foiled Butterfly Card with Glimmer II

    BP-351

    How to Make a Colorful Foiled Butterfly Card with Glimmer II

    Combine hot foiling, alcohol-marker coloring, ink blending, and dimensional shaping to create a colorful butterfly card that sparkles from every angle. In this step-by-step tutorial, you’ll learn how to foil detailed butterflies and a floral background with the Glimmer II Hot Foil System, add bold color, and shape the butterfly wings for a realistic raised effect. The Bright Butterflies and Thanks In Bloom Press +...

  • How to Heat Emboss with BetterPress Plates: Snowman Christmas Card

    BP-001

    How to Heat Emboss with BetterPress Plates: Snowman Christmas Card

    BetterPress plates can do more than create letterpress impressions and hot-foiled designs. In this detailed Christmas card tutorial, you’ll learn how to apply clear sticky ink to a BetterPress plate and use white embossing powder to produce a crisp, heat-embossed snowflake background. The tutorial also covers pressing and die cutting a sentiment, assembling three detailed snowmen, and arranging the finished elements on an A2 card....

  • How to Use the Reverse Foiling Technique on a Colorful Window Card

    BP-001

    How to Use the Reverse Foiling Technique on a Colorful Window Card

    Create a bright, modern card while learning how to use the negative foil left behind after hot foiling. In this step-by-step tutorial, you’ll foil the detailed Windows with a View design, use a solid plate to reverse foil the remaining image, and turn selected windows into dimensional embellishments. An ink-blended striped background, BetterPress sentiment, and sparkling gems complete the design. This project is ideal for...































