Die D-Lites Inspiration | Pandas and Dinosaurs with Brenda
on March 03, 2018

Die D-Lites Inspiration | Pandas and Dinosaurs with Brenda

Hello everyone!! This is Brenda Noelke from My PaperCut Creations. I am excited to be here for my third & final guest post for Spellbinders!! I will be using the fabulous February Die D-Lites Release for all of my projects. You can find my first project here & my second one here.

Panda Card

Today, I have two projects to share with you! These are cards for kids. Normally, I tend to gravitate toward flowers in my projects, but I like to challenge myself by using different products. My husband & I don’t have any children of our own (just two furbabies), but I do have several nieces. My four year-old niece carries a panda around with her everywhere, so I was excited to see the Build A Panda Etched Dies in this release!
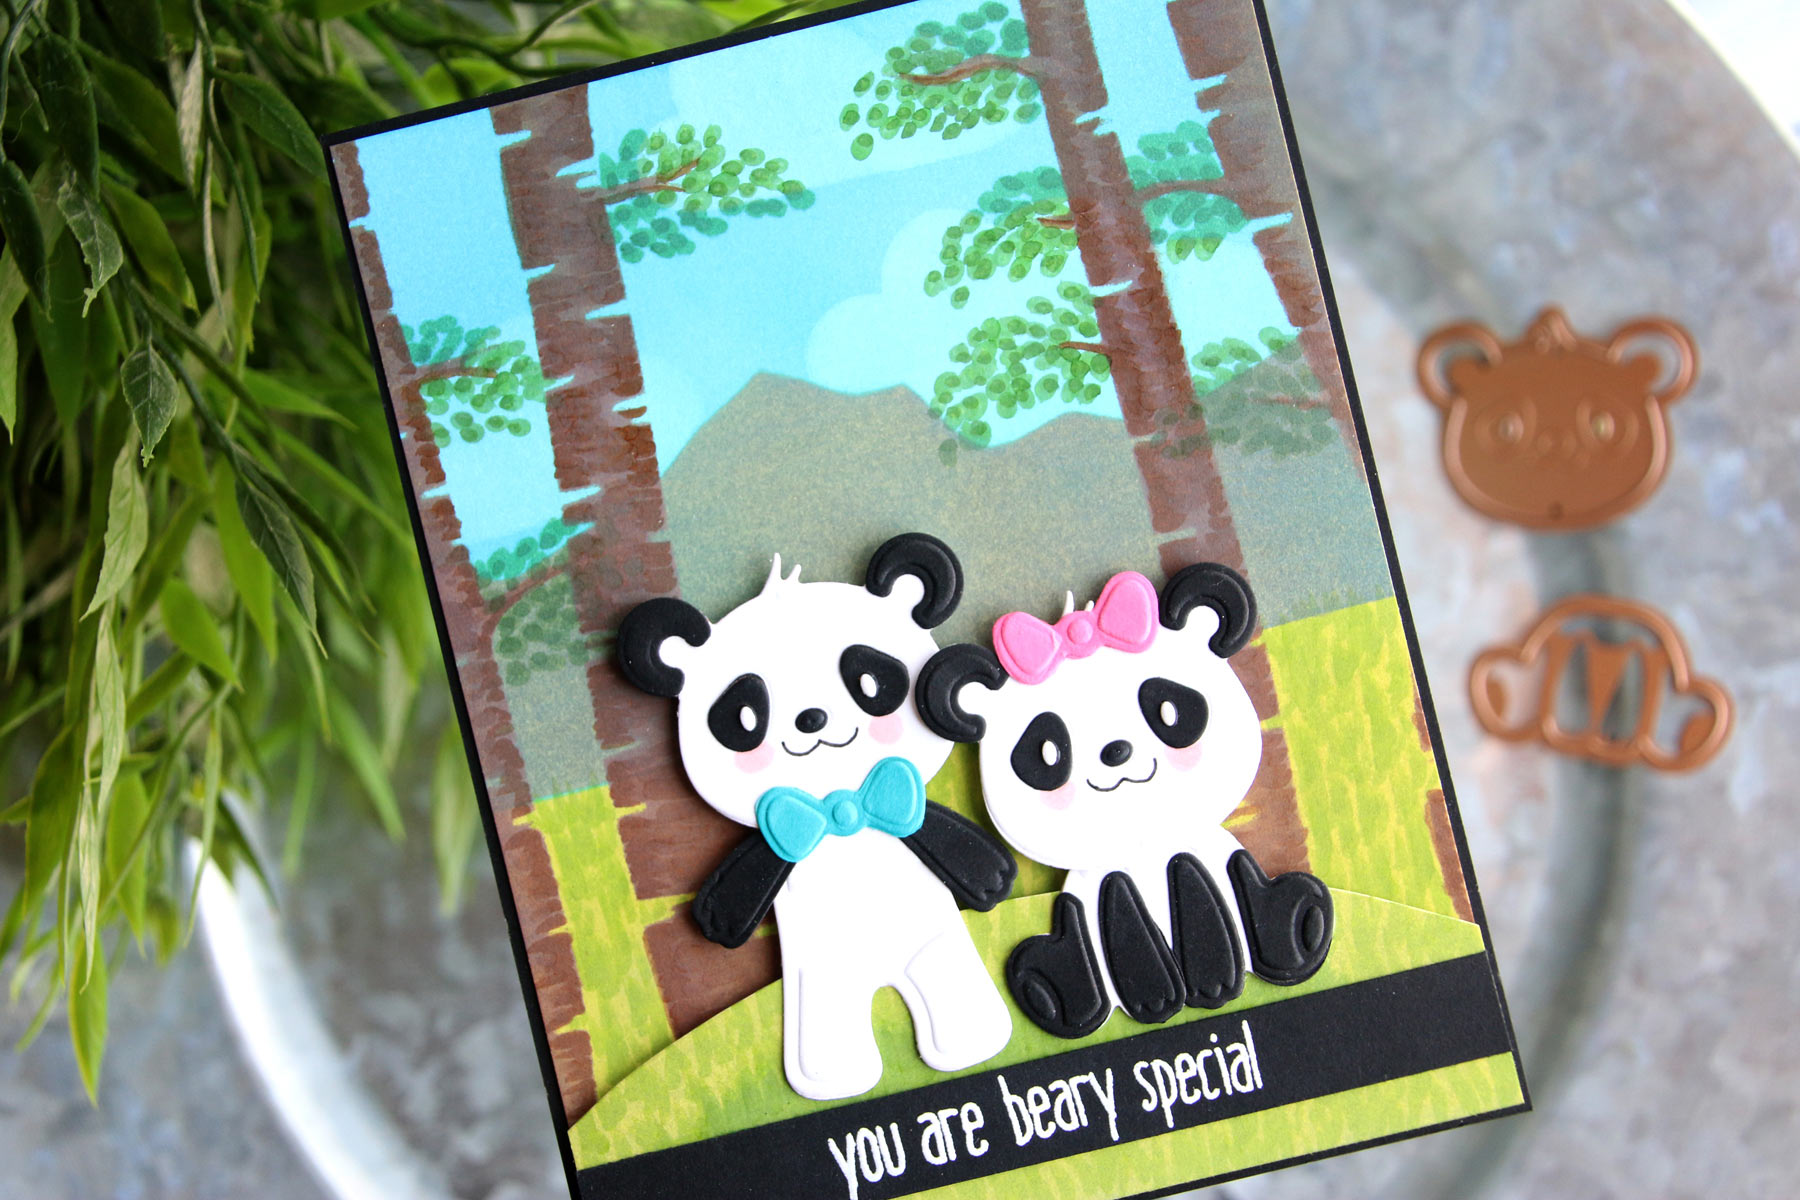
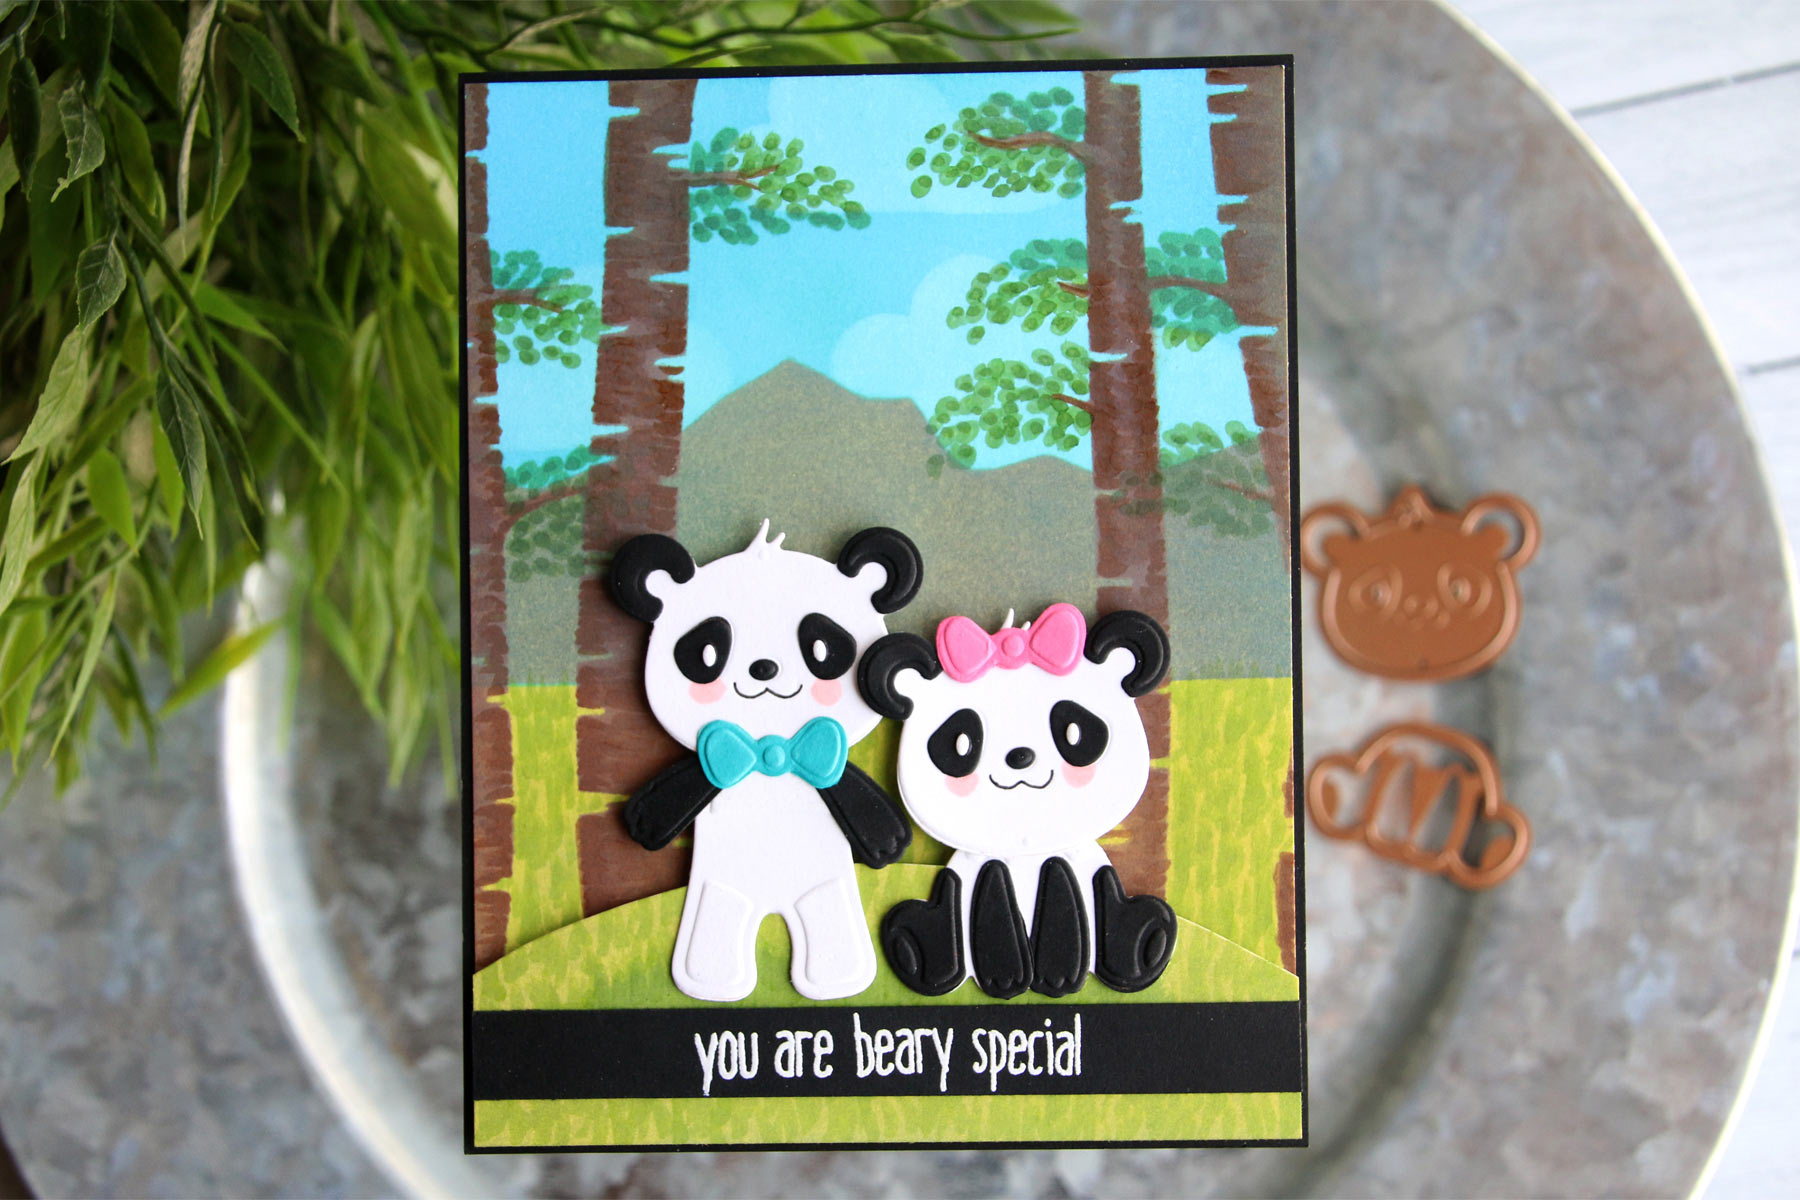
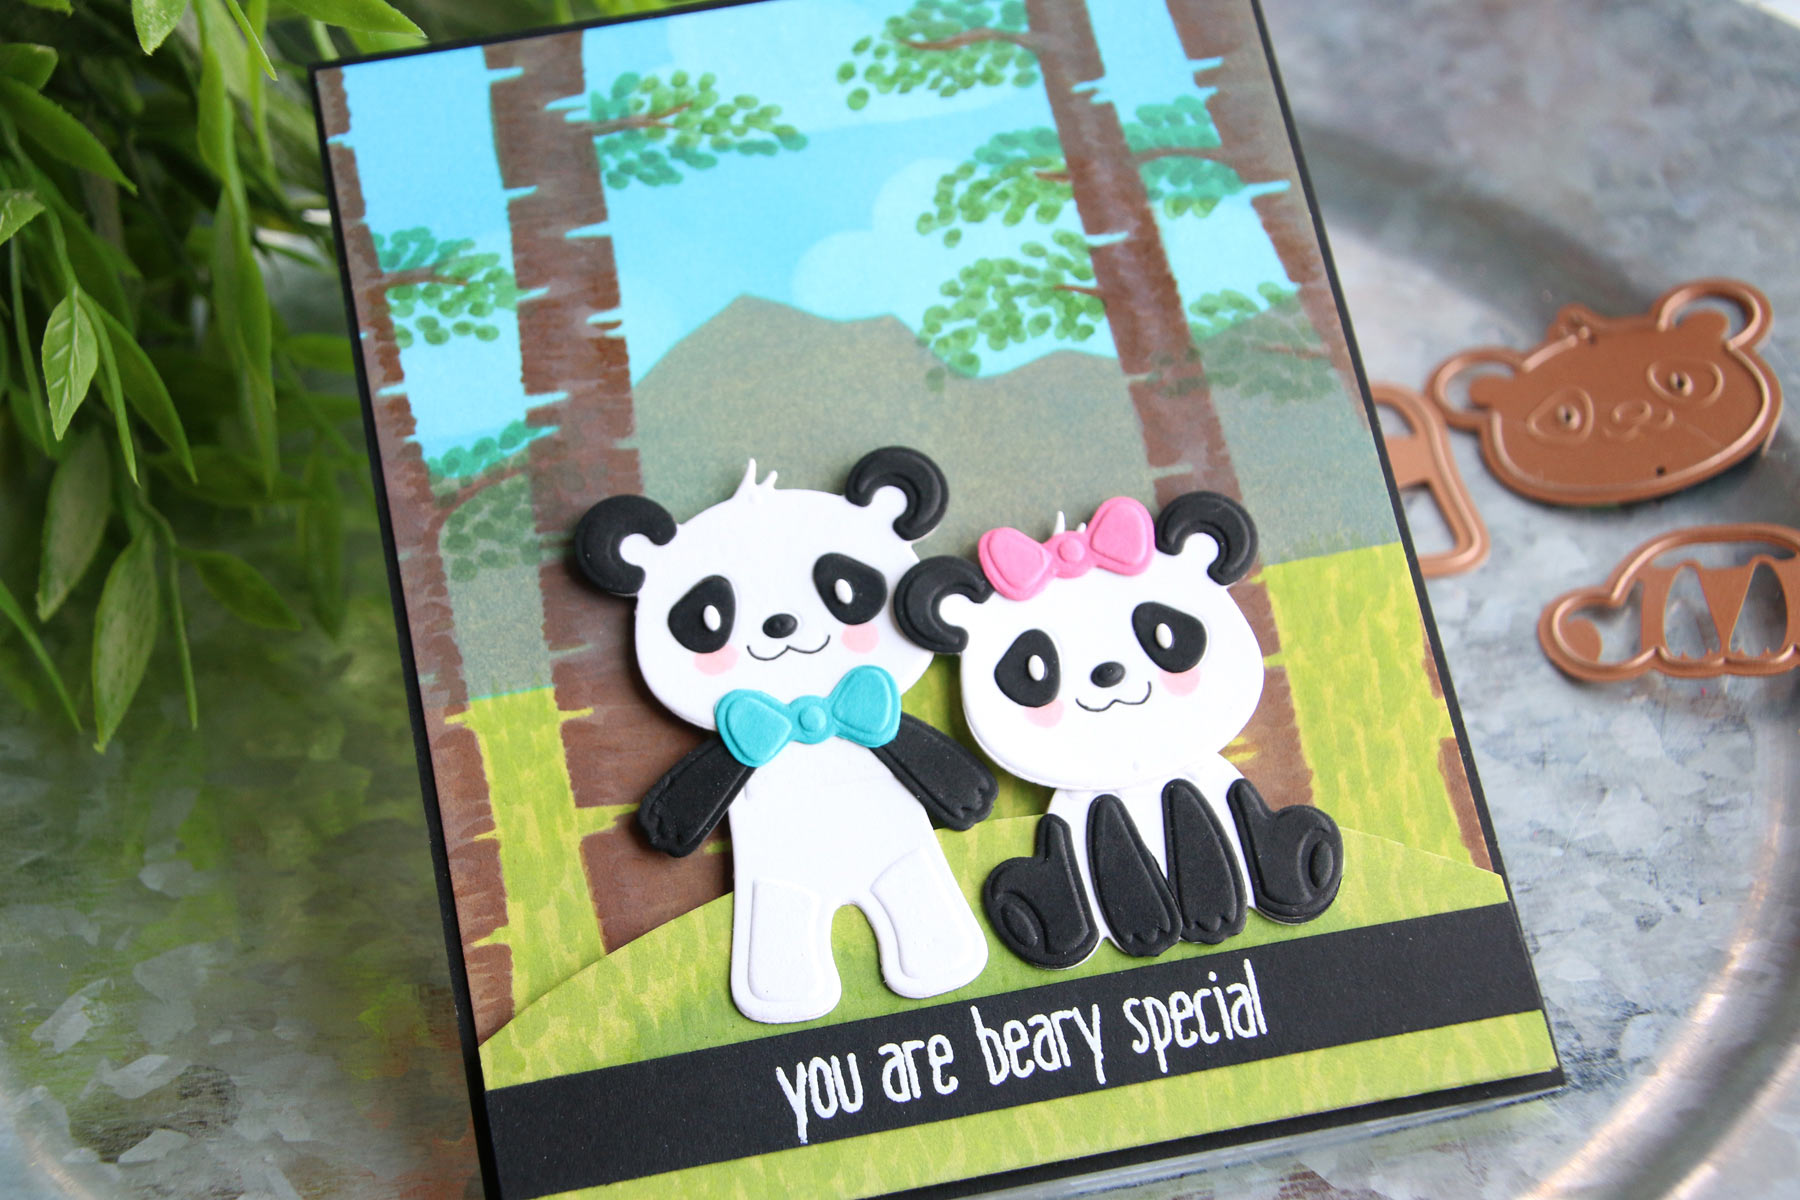
Die D-Lites Inspiration | Pandas and Dinosaurs with Brenda for Spellbinders using S3-318 Build A Panda and S3-317 Dinosaurs dies #spellbinders #cardmaking #diecutting #handmadecard

I began by using the Build A Panda Etched Dies to die-cut the shapes from black, white, pink & blue cardstock. After they were cut, I ran them through the die-cut machine a second time with an Embossing Pad to create the embossed areas on the die-cuts. Next, all the die-cut pieces were assembled and adhered together.

Die D-Lites Inspiration | Pandas and Dinosaurs with Brenda for Spellbinders using S3-318 Build A Panda and S3-317 Dinosaurs dies #spellbinders #cardmaking #diecutting #handmadecard

Distress Oxide Inks were blended onto smooth cardstock, using scene builder stencils, to create a background panel for the pandas. I also ink blended and cut a curved piece of cardstock to add some dimension to the bottom of my background panel. I used Copic markers to draw in some additional details on the background, as well as add a little blush on the pandas’ cheeks. The panel was trimmed down slightly to allow a bit of black cardstock to show around the edges. The sentiment was stamped with clear embossing ink and heat embossed with white embossing powder. It was then cut into a strip and adhered toward the bottom of the curved cardstock, trimming on each side. The pandas were adhered onto the curved piece of cardstock, then adhered as one piece with dimensional adhesive. I can’t wait to give this to my niece! I just know she is going to love it!

Die D-Lites Inspiration | Pandas and Dinosaurs with Brenda for Spellbinders using S3-318 Build A Panda and S3-317 Dinosaurs dies #spellbinders #cardmaking #diecutting #handmadecard

Spellbinders Supplies:

Other Supplies:

Neenah 110lb.cardstock; Bristol Smooth cardstock; black, blue & pink cardstock; Ranger Distress Oxide Inks: Peeled Paint, Twisted Citron, Walnut Stain, Frayed Burlap, Vintage Photo, Peacock Feathers, Salty Ocean; The Ton Hampton White Pigment Ink; Honey Bee Outdoor Scene Builder stencil; Copic markers; Honey Bee Flakey Friends stamp set; Ranger Multi-Medium Matte; Scotch foam tape; Versamark; Ranger Detail White Embossing Powder

Dinosaurs Card

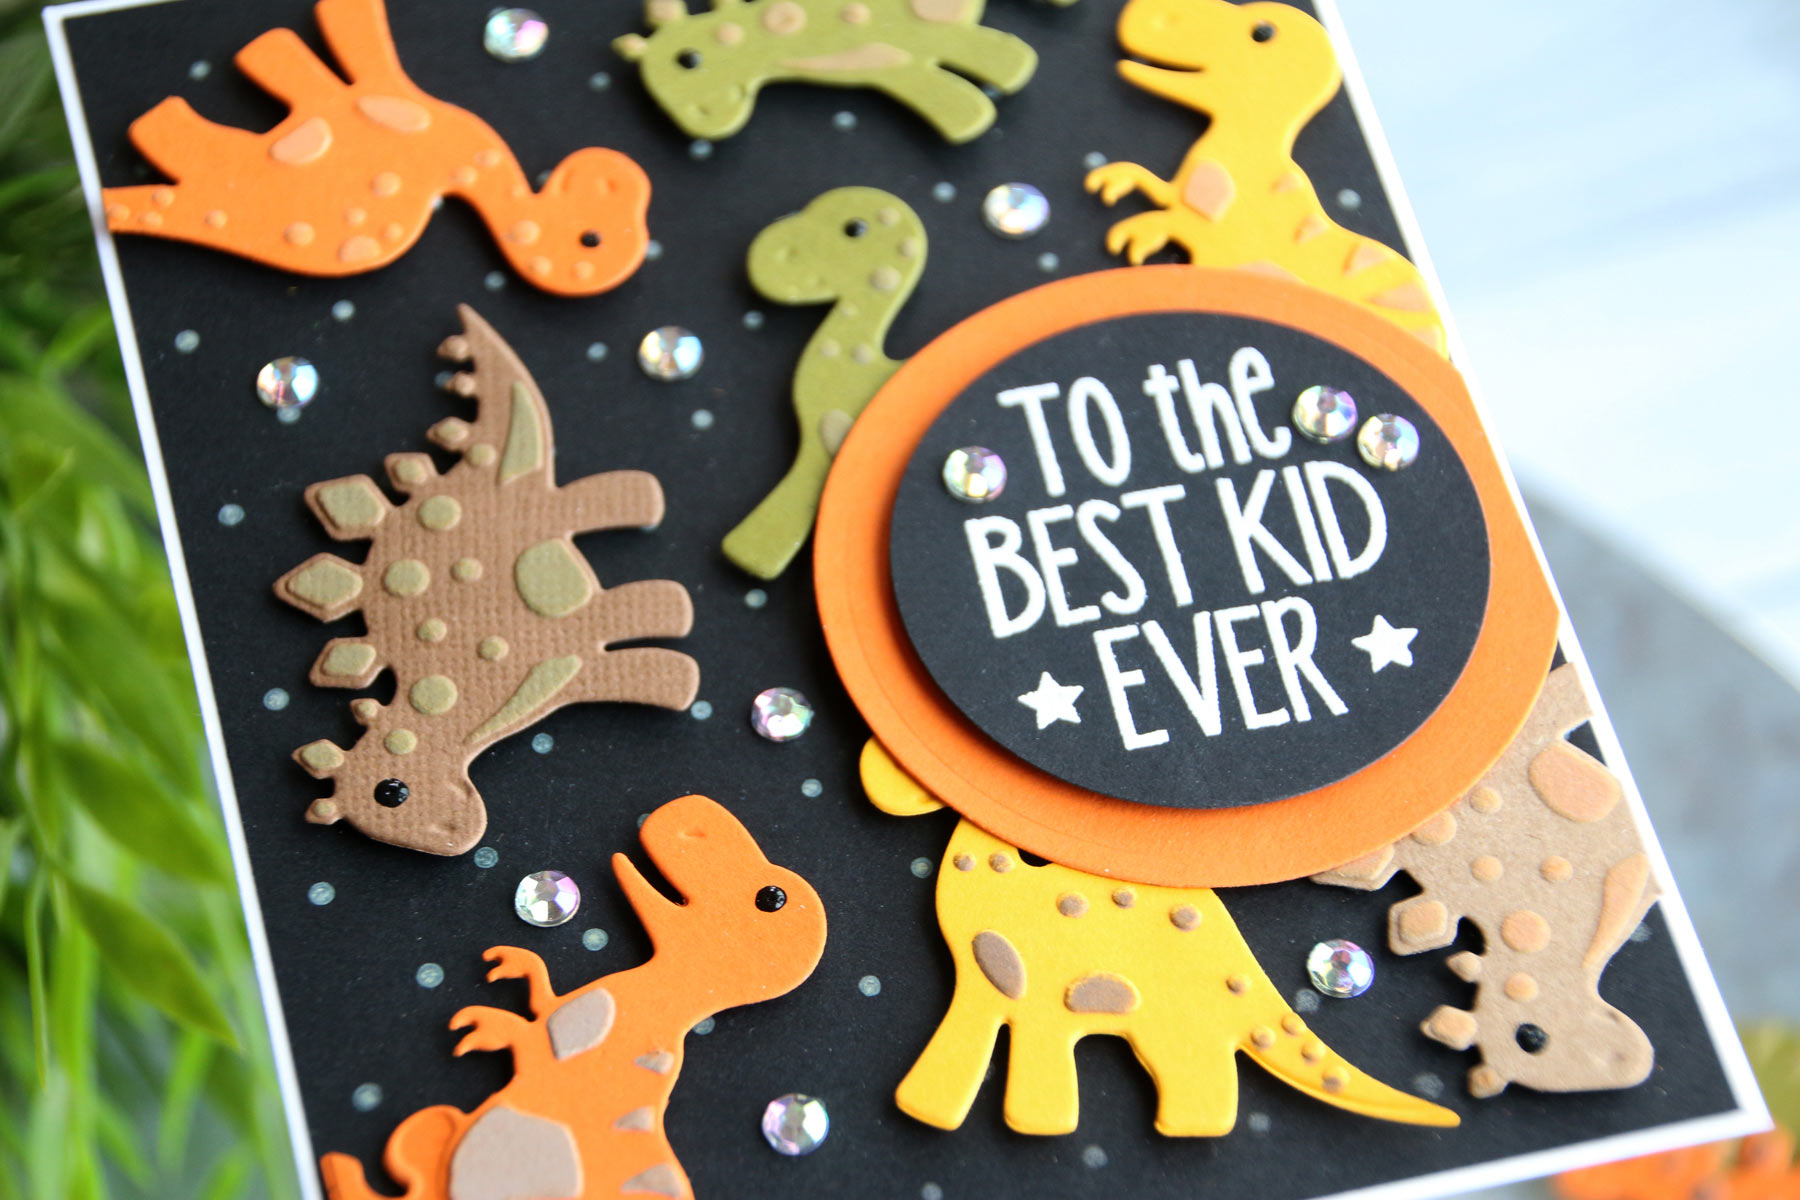
My second card is geared more toward boys…
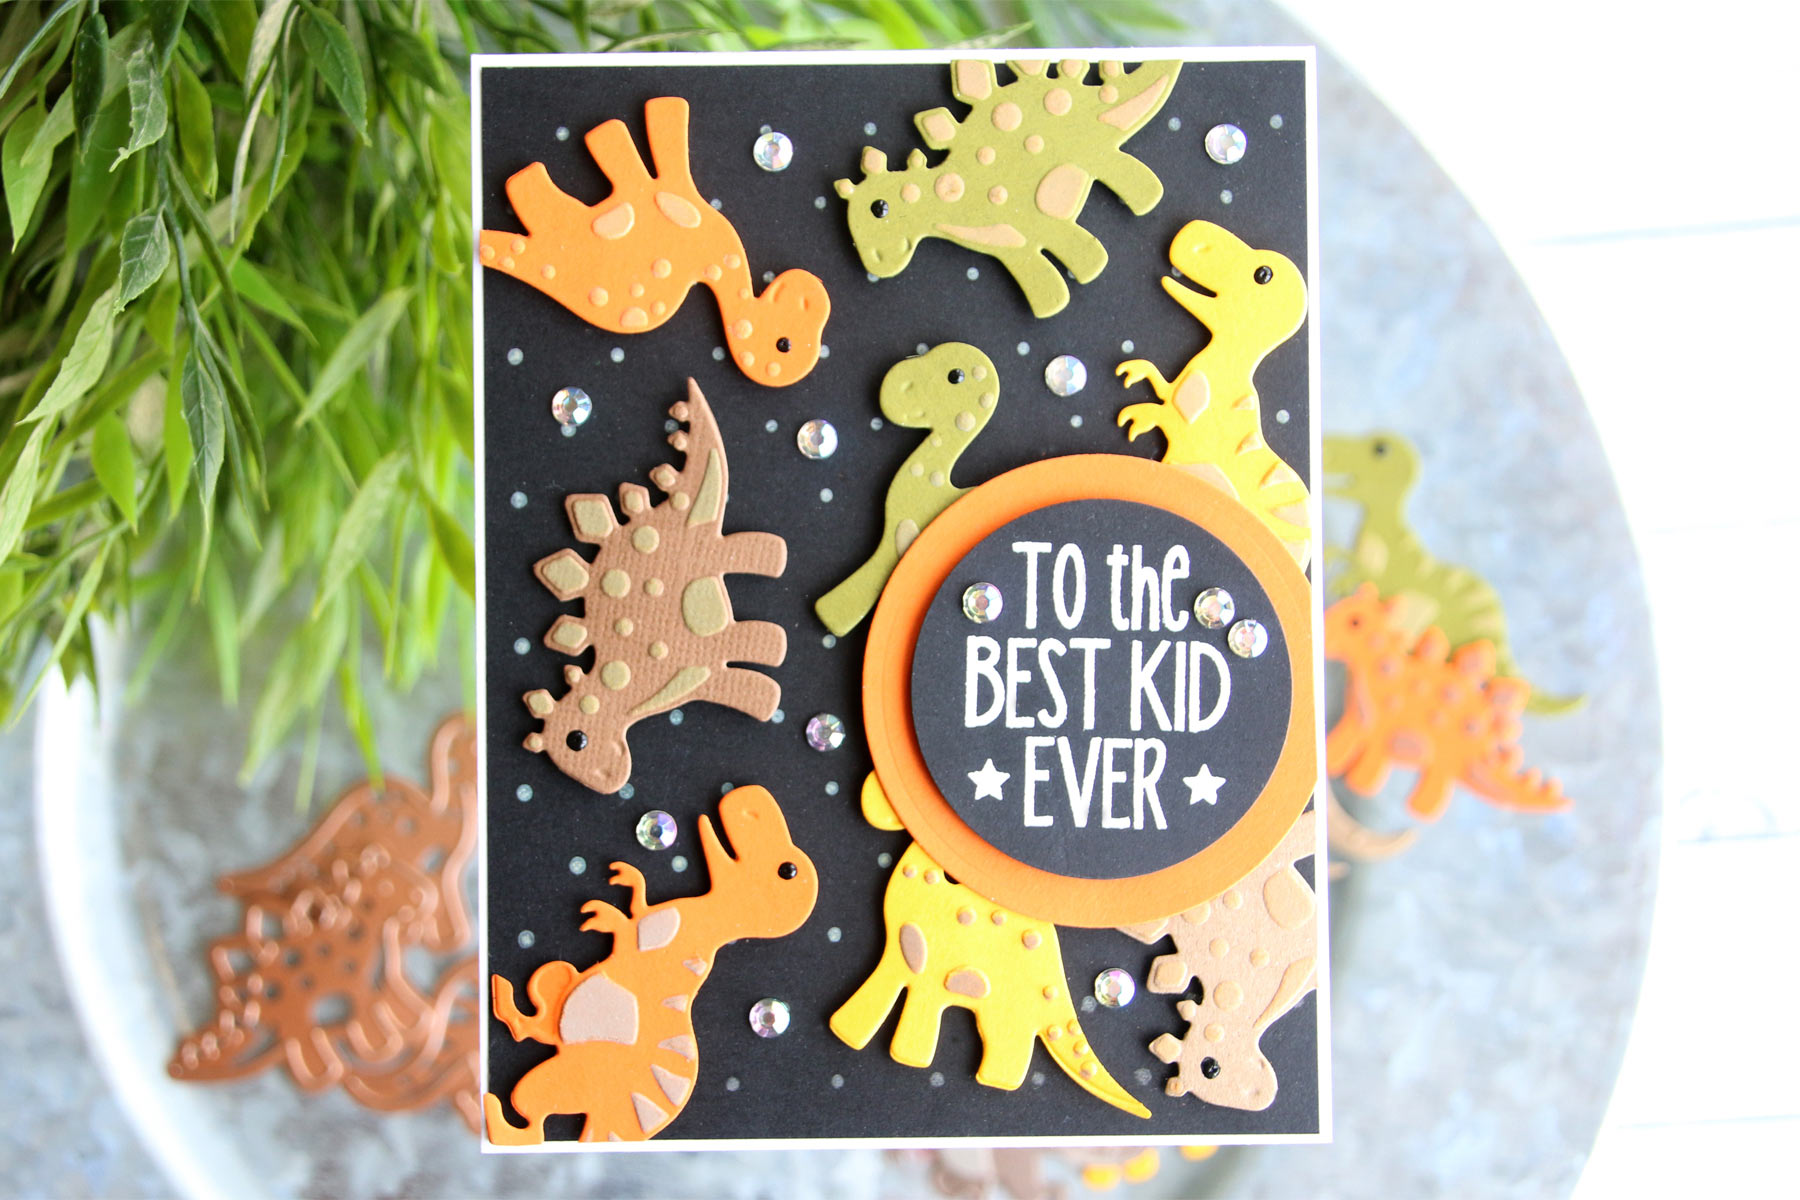
Die D-Lites Inspiration | Pandas and Dinosaurs with Brenda for Spellbinders using S3-318 Build A Panda and S3-317 Dinosaurs dies #spellbinders #cardmaking #diecutting #handmadecard

I started off by die-cutting all the Dinosaurs Etched Dies from various colored cardstock several times, then running them back through with the Embossing Pad to create the embossed areas. Before removing the dies, Distress Oxide Inks were blended through the dies, to create some color on the raised areas. I added some black dimensional drops to the eyes, then set them aside to dry.

Die D-Lites Inspiration | Pandas and Dinosaurs with Brenda for Spellbinders using S3-318 Build A Panda and S3-317 Dinosaurs dies #spellbinders #cardmaking #diecutting #handmadecard

I used the same Distress Oxide Inks with a polka-dot stamp on black cardstock for the background panel. The dinosaurs were popped up with foam adhesive onto the background panel, then trimmed flush where they hung off the edge. The sentiment was stamped with clear embossing ink onto black cardstock, then heat embossed with white embossing powder. The sentiment, as well as a piece of orange cardstock, was die-cut using the Nestabilities Standard Circle Dies. Both circles were also adhered with foam adhesive and trimmed as shown. Lastly, some rhinestones were added for a little bling!

Die D-Lites Inspiration | Pandas and Dinosaurs with Brenda for Spellbinders using S3-318 Build A Panda and S3-317 Dinosaurs dies #spellbinders #cardmaking #diecutting #handmadecard

Spellbinders Supplies:

Other Supplies:

Neenah 110lb.cardstock; black, green, orange, yellow, brown & kraft cardstock; Ranger Distress Oxide Inks: Antique Linen, Peeled Paint, Frayed Burlap, Spiced Marmalade, Fossilized Amber, Vintage Photo; Hero Arts Critters stamp set; The Ton Delicate Polka Dot Cling Stamp; Scotch foam tape; Versamark; Ranger Detail White Embossing Powder; Onyx Black Nuvo Drops; Honey Bee Crystal AB Sticky Back Rhinestones Thanks so much for joining me today! Special thanks to Spellbinders, for having me. It has been an absolute pleasure to guest post for them and use their fabulous products!

Leave a comment

Your email will not be published. Please note, comments need to be approved before they are published.


  • HOW TO USE PRESS PLATES WITH MULTIPLE INKS | CREATE YOUR WAY HOLIDAY, BPR-050, BPI-049, BPI-003

    BP-001

    How to Use Multiple Ink Colors with BetterPress Registration Plates

    Create a colorful Christmas card while learning how to apply multiple ink colors to BetterPress registration plates. In this detailed tutorial, you’ll use the Festive Evergreens Registration Press + Foil Plate & Die Set to press a holiday doorway scene in three colors, combining the built-in registration system with a simple masking technique. The registration template positions the coordinating plates so each layer aligns with...

  • How to Make a Colorful Foiled Butterfly Card with Glimmer II

    BP-351

    How to Make a Colorful Foiled Butterfly Card with Glimmer II

    Combine hot foiling, alcohol-marker coloring, ink blending, and dimensional shaping to create a colorful butterfly card that sparkles from every angle. In this step-by-step tutorial, you’ll learn how to foil detailed butterflies and a floral background with the Glimmer II Hot Foil System, add bold color, and shape the butterfly wings for a realistic raised effect. The Bright Butterflies and Thanks In Bloom Press +...

  • How to Heat Emboss with BetterPress Plates: Snowman Christmas Card

    BP-001

    How to Heat Emboss with BetterPress Plates: Snowman Christmas Card

    BetterPress plates can do more than create letterpress impressions and hot-foiled designs. In this detailed Christmas card tutorial, you’ll learn how to apply clear sticky ink to a BetterPress plate and use white embossing powder to produce a crisp, heat-embossed snowflake background. The tutorial also covers pressing and die cutting a sentiment, assembling three detailed snowmen, and arranging the finished elements on an A2 card....