
One Card Design 2 Ways - Sending You Strength Card
on November 13, 2017

One Card Design 2 Ways - Sending You Strength Card

Hello everyone, this is Yana Smakula and thank you for joining me! Today I’d like to share a photo tutorial featuring one card design 2 ways. By changing up the papers and colors you can easily stretch a card design and get a completely different look.

Here's a look at the green/copper card:

One Card Design 2 Ways - Sending You Strength Card by Yana Smakula for Spellbinders. Using: S4-732 Curled Grace Oval, S4-705 Graceful Brackets, SDS-055 Beautiful Dreamer Stamp And Die Set, S6-001 5x7 Matting Basics A, S6-002 5x7 Matting Basics B Dies

And here's identical project done in pink/gold:
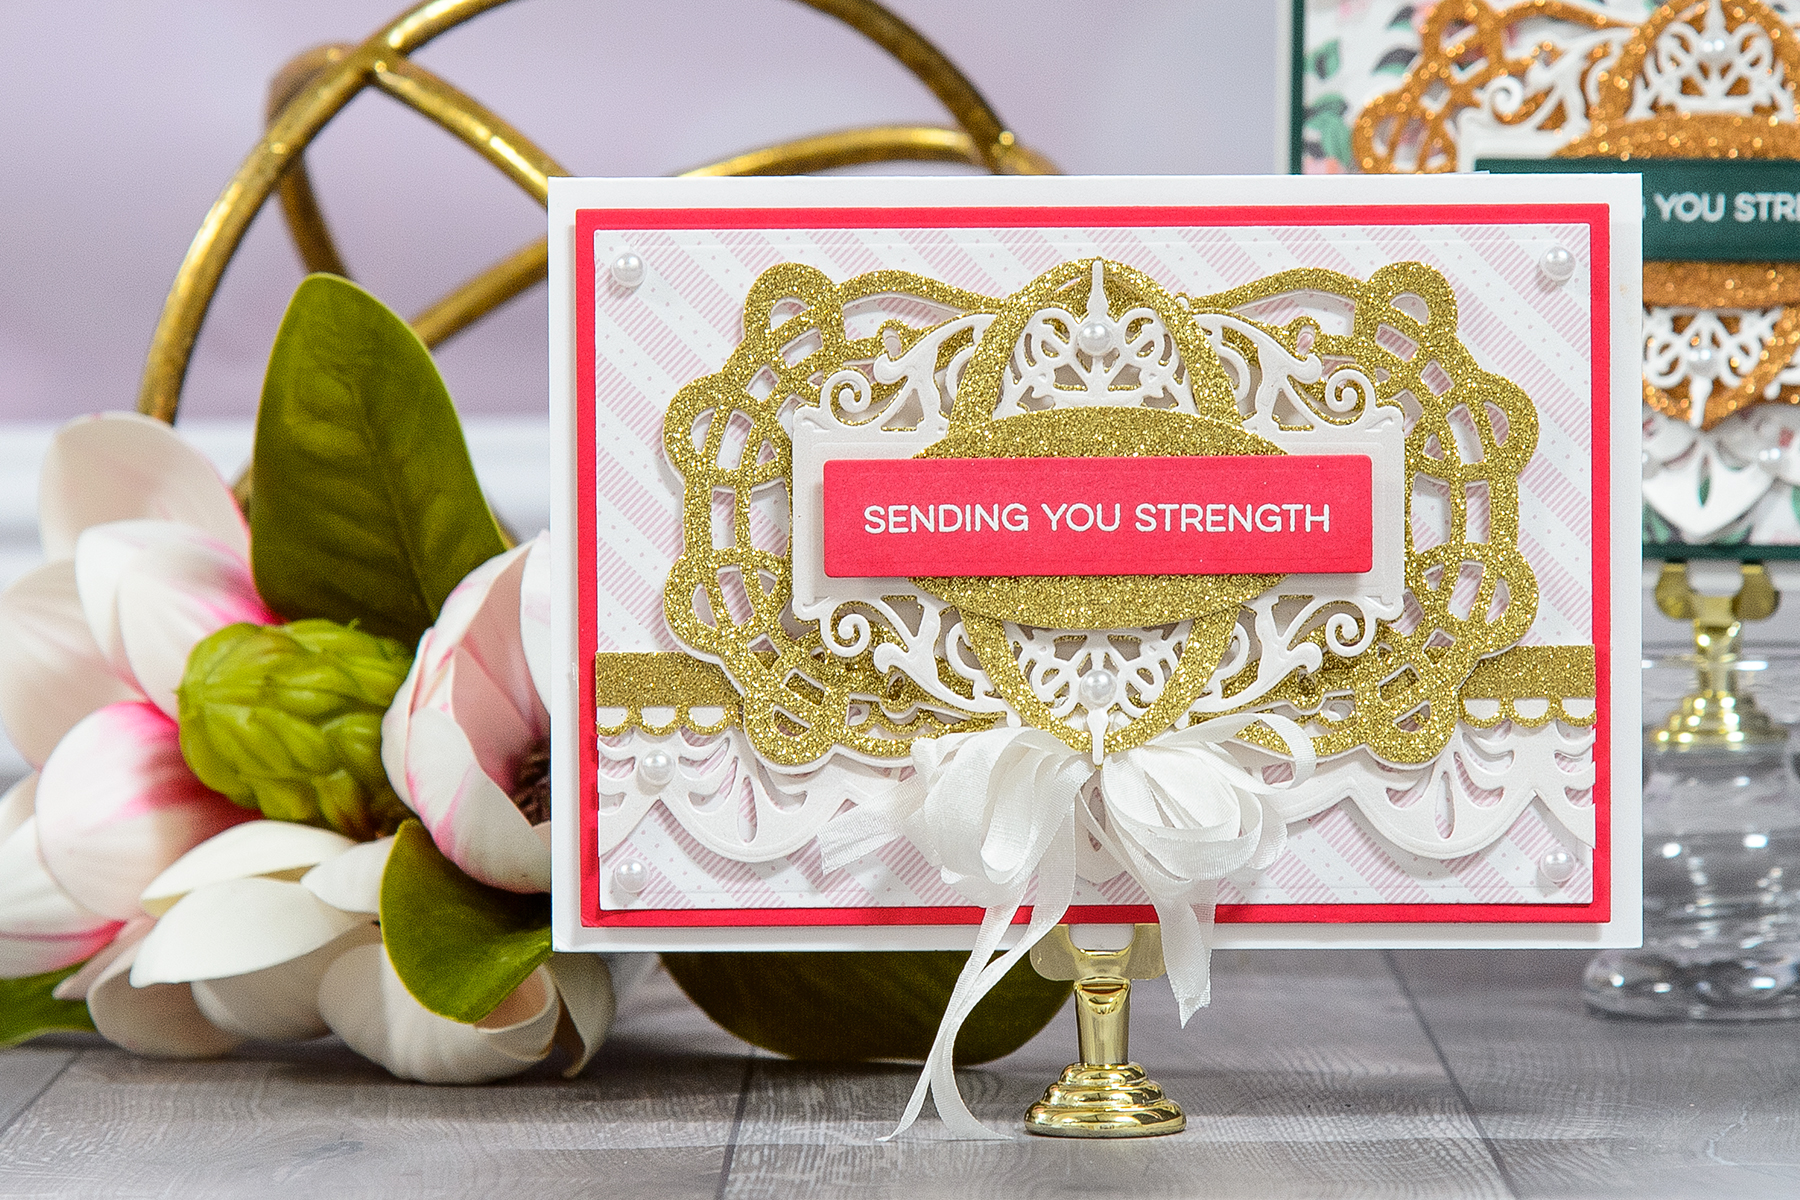
One Card Design 2 Ways - Sending You Strength Card by Yana Smakula for Spellbinders. Using: S4-732 Curled Grace Oval, S4-705 Graceful Brackets, SDS-055 Beautiful Dreamer Stamp And Die Set, S6-001 5x7 Matting Basics A, S6-002 5x7 Matting Basics B Dies

This card was published in the Die-cutting Essentials Magazine Issue 25 along with a few other cards done in a similar style - check it out for more inspiration.
Instead of filming a video for this project, I put together a simple photo tutorial describing every step of the cardmaking process. Also, follow my written instructions below for more info:

One Card Design 2 Ways - Sending You Strength Card by Yana Smakula for Spellbinders

Instructions:

Begin by creating a 5x7” landscape top folding card base out of white cardstock. I used thick 110 Neenah Solar White paper for this. Die-cut panels out of dark green cardstock and patterned paper using dies from 5x7 Matting Basics A and B sets. Adhere the two together. Use foam adhesive to adhere onto the card base (I used a solid layer of fun foam to make my card sturdier).

One Card Design 2 Ways - Sending You Strength Card by Yana Smakula for Spellbinders. Using: S4-732 Curled Grace Oval, S4-705 Graceful Brackets, SDS-055 Beautiful Dreamer Stamp And Die Set, S6-001 5x7 Matting Basics A, S6-002 5x7 Matting Basics B Dies

Die-cut a border by using dies from the Graceful Brackets set out of copper glitter and white pearlescent cardstock. Since the card is wider than the bracket border itself you’ll need to elongate the border by continuing the cut on left and right sides. Adhere copper glitter border cut onto pearlescent border and both card base.

One Card Design 2 Ways - Sending You Strength Card by Yana Smakula for Spellbinders. Using: S4-732 Curled Grace Oval, S4-705 Graceful Brackets, SDS-055 Beautiful Dreamer Stamp And Die Set, S6-001 5x7 Matting Basics A, S6-002 5x7 Matting Basics B Dies

Die-cut main element using dies from the Curled Grace Oval set out of copper glitter and White pearlescent cardstock (use Outer Border and Inlaid Curls dies). Adhere copper glitter die cut onto pearlescent die cut and offset slightly. Foam mount onto the card.

One Card Design 2 Ways - Sending You Strength Card by Yana Smakula for Spellbinders. Using: S4-732 Curled Grace Oval, S4-705 Graceful Brackets, SDS-055 Beautiful Dreamer Stamp And Die Set, S6-001 5x7 Matting Basics A, S6-002 5x7 Matting Basics B Dies

Die-cut label from the Beautiful Dreamer Stamp And Die set out of pearlescent cardstock. Die-cut Outer Oval and Inner Oval dies from the Curled Grace Oval set out of copper glitter cardstock. Attach the oval frame onto the label as shown, foam mount onto the card. Foam mount solid oval shape.

One Card Design 2 Ways - Sending You Strength Card by Yana Smakula for Spellbinders. Using: S4-732 Curled Grace Oval, S4-705 Graceful Brackets, SDS-055 Beautiful Dreamer Stamp And Die Set, S6-001 5x7 Matting Basics A, S6-002 5x7 Matting Basics B Dies

Die-cut insert from the Beautiful Dreamer Stamp And Die Set out of green cardstock. Heat emboss sentiment in white embossing powder, foam mount onto the card.

Embellish with white pearls.

Spellbinders Supplies:

Other supplies:

First Edition Sweet Nothings 12x12 Paper Pad; Cardstock: Neenah Solar White 110 LB cardstock, My Colors Cardstock Hunter Green 12x12 cardstock, My Paper Studio Solid Glitter Copper 12x12 cardstock, White pearlescent cardstock; White Self Adhesive Pearls; Adhesive: Scrapbook Adhesives 3D Foam Squares, My Favorite Things Essential Sentiments Stamp; Hero Arts White Embossing Powder; Versamark Embossing Ink Pad. Thank you so much for stopping by today and have fun die cutting!

Leave a comment

Your email will not be published. Please note, comments need to be approved before they are published.


  • HOW TO USE PRESS PLATES WITH MULTIPLE INKS | CREATE YOUR WAY HOLIDAY, BPR-050, BPI-049, BPI-003

    BP-001

    How to Use Multiple Ink Colors with BetterPress Registration Plates

    Create a colorful Christmas card while learning how to apply multiple ink colors to BetterPress registration plates. In this detailed tutorial, you’ll use the Festive Evergreens Registration Press + Foil Plate & Die Set to press a holiday doorway scene in three colors, combining the built-in registration system with a simple masking technique. The registration template positions the coordinating plates so each layer aligns with...

  • How to Make a Colorful Foiled Butterfly Card with Glimmer II

    BP-351

    How to Make a Colorful Foiled Butterfly Card with Glimmer II

    Combine hot foiling, alcohol-marker coloring, ink blending, and dimensional shaping to create a colorful butterfly card that sparkles from every angle. In this step-by-step tutorial, you’ll learn how to foil detailed butterflies and a floral background with the Glimmer II Hot Foil System, add bold color, and shape the butterfly wings for a realistic raised effect. The Bright Butterflies and Thanks In Bloom Press +...

  • How to Heat Emboss with BetterPress Plates: Snowman Christmas Card

    BP-001

    How to Heat Emboss with BetterPress Plates: Snowman Christmas Card

    BetterPress plates can do more than create letterpress impressions and hot-foiled designs. In this detailed Christmas card tutorial, you’ll learn how to apply clear sticky ink to a BetterPress plate and use white embossing powder to produce a crisp, heat-embossed snowflake background. The tutorial also covers pressing and die cutting a sentiment, assembling three detailed snowmen, and arranging the finished elements on an A2 card....






























