

Posted by Emily Midgett
on August 09, 2022

Hi there! Emily Midgett here with you today sharing some inspiration using new goodies from the August release! One of my favorite things about the Hero Arts releases is the fantastic standalone dies; you can use them in so many different ways and pair them with so many different techniques. I personally love customizing them by doing some selective trimming and/or adding detail to the silhouette dies with watercolors or Copic markers, and the new Looking Glass Forest and Mountains set was perfect for adding a little bit of extra detail with my Copic markers. I paired it with some older dies, as well as the chic lady from the On the Road Fancy Die. Let's get started with the details!

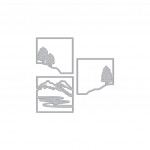
I began by die cutting each of the components from the Looking Glass Forest and Mountains set from squares of Deluxe Smooth White cardstock. For the two tree layers, I simply used a green and brown Copic marker to add color to the pine trees, but for the mountain layer, I reserved the cutout sections so that I could color the mountains on either side of the stream without trying to guess where to put the coloring! I trimmed down a square of plain cardstock the same size for the backdrop, then lightly blended Dusty Blue ink at the top for the sky. I adhered the three Copic colored Looking Glass die cuts to the square of sky with Precision Glue.

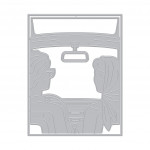
Next, I die cut the fabulous new On the Road Fancy Die from some more white cardstock. Using sharp, pointed scissors, I trimmed away all of the "extras" around the chic lady passenger. Removing all of the extras gives her lots of versatility for tons of different scenes! I colored her using Copic markers, adding some pearl earrings using drops of White Hero Pearls. I love how she looks like she's wistfully looking at a photo of previous travels or even out a window!

For the backdrop, I die cut the Bold Graphic Confetti Die from some more white cardstock and layered it on a white A2 card base. This white-on-white creates a beautifully textured backdrop for our boldly colored standalone die cuts, almost like white textured wallpaper! I added a Looking Glass Ornate Frame to the mountain scene and adhered it with some more liquid glue. I added the Copic-colored lady using a double layer of foam tape to help give her lots of height and give the feeling that she was closer to the viewer than she was to the photo of her travels. Finally, I added a greeting from the Winding Road HeroScape on a white cardstock strip, tucking it just slightly behind the lady with a single layer of foam tape.
Well, that's all for my project today! I hope it inspires you to add some color to your standalone Fancy Dies from Hero Arts. They are so much fun to customize, whether it's with color or selective trimming, to create completely unique projects! Thanks so much for stopping by, and have a marvelous day.
P.S. - The Looking Glass Dies are perfect for the current Stay Crafty with A Blog Named Hero challenge! This month the theme is "Hip to be Square."

You can check out all of the details on the challenge and how to enter by clicking HERE.

|























































































2 comments
Wonderful creativity for stretching use of dies customizing like this.
Looking fwd to rcving my subscription kit and add-ons.
Melissa
“Sunshine HoneyBee”
This is a wonderful card. Not only is it beautiful, but it shows the possibilities of how to use the dies.