Sending Smiles Wreath - Hero Arts
Posted by Ilina Crouse on January 24, 2020

Sending Smiles Wreath

Hi everyone! llina here. Today I am sharing a fun card using the new Flower Bouquet Pieces stamp set and the coordinating Frame Cuts. This versatile set can be used to create a bouquet with the included wrapper stamp, or to create a wreath as I'm showing today.

To make the card start by stamping one of the flower images using Intens-ified Black ink on Dove White cardstock and watercolor them with Taffy, Pool Party and Lemon Drop Reactive Inks. Once colored (and dried) die cut them. Set them aside. You will need 8 flowers.

Cut a 4" x 5 1/4" panel from Dove White cardstock and stamp leaves with Intens-ified Black ink. I used the Gina K wreath builder template to stamp the leaves. Once stamped, watercolor them using Key Lime Fizz and Green Apple Reactive Inks. Adhere the flowers using foam adhesive to give them some dimension.

Stamp sentiment on Pitch Black cardstock using Clear Embossing and Watermark Ink and emboss in white. Cut to size and adhere over the wreath.

Using fun foam, adhere the stamped panel onto a top folding Pitch Black note card (4 1/4" x 11" piece of cardstock scored in half). Decorate with Sunset Enamel Dots.

Thank you so much for stopping by and hope you have a wonderful day!

Click on the products to shop:
CM432 Flower Bouquet Pieces - Hero Arts
HA ]
DI732 Flower Bouquet Pieces Frame...
HA ]
AF435 Intens-ified Black Ink Pad -...
HA ]
AF420 Taffy Reactive Ink - Hero Arts
HA ]
AF426 Pool Party Reactive Ink
HA ]
AF423 Lemon Drop Reactive Ink
HA ]
AF424 Key Lime Fizz Reactive Ink
HA ]
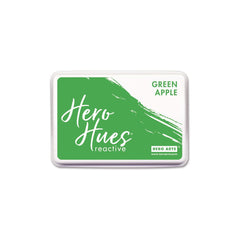
AF425 Green Apple Reactive Ink - Hero...
HA ]
PS325 Hero Hues Dove white - Hero Arts
HA ]
PS323 Hero Hues Premium Cardstock...
HA ]
AF419 Clear Embossing & Watermark Ink
HA ]
PW110 White Embossing Powder - Hero Arts
HA ]
CH328 Sunset Hero Hues Enamel Dots -...
HA ]

2 comments

Beautiful card! I haven’t used my stamps yet. I need to get busy!

Deborah Cooper,

Gorgeous card Ilina, I love how you gave this beautiful wreath dimension.
Thank you so much for sharing and have a great weekend.

Henriëtte,

Leave a comment

Please note, comments need to be approved before they are published.


  • Spellbinders Beginners Blog Post Series - Common Cardmaking Mistakes (and How to Fix Them)

    Beginner’s Guide to Cardmaking

    Common Cardmaking Mistakes and How to Fix Them: A Beginner's Guide

    Mistakes happen to every cardmaker, from beginners to experienced crafters. This comprehensive guide shares practical solutions for fixing common cardmaking mistakes, including stamping, die cutting, foiling, BetterPress, ink blending, stenciling, coloring, heat embossing, and more, so you can confidently rescue your handmade cards instead of starting over.

  • How to make a Polar Bear Christmas Card with Alcohol Markers, HUR93909, S7-291, S5-619

    CS-8-100

    How to make a Polar Bear Christmas Card with Alcohol Markers

    Hello, cardmaking friends! It’s Mona Tóth here, and I’m so happy to be back on the Spellbinders blog. Today, I’m sharing a Christmas step-by-step card tutorial featuring the Polar Friends Stamp and Die Set by Simon Hurley. This card was inspired by the Christmas advertisements I remember seeing on television when I was a child in the 1990s. They often featured polar bears surrounded by...

  • Interactive Scrapbook Layout Using the Turn the Page Collection by Esther Glas, SCSP-037, SCSE-054, SCSE-039, SCSR-016, E3D-186, STP-279, SDS-232, S2-473, S7-298, S7-295

    E3D-186

    Interactive Scrapbook Layout Using the Turn the Page Collection by Esther Glas

    Hello, crafty friend! I’m Adrienne Boese, better known online as Alice Scraps Wonderland. I love a good interactive scrapbook page! It can be something as simple as a pocket or something more intricate like a waterfall mechanism or flips. Today, we are going to focus on one of those simple techniques - a pocket!  It’s the perfect technique to dip your toes into the interactive...