

Posted by Spellbinders Team
on July 19, 2017

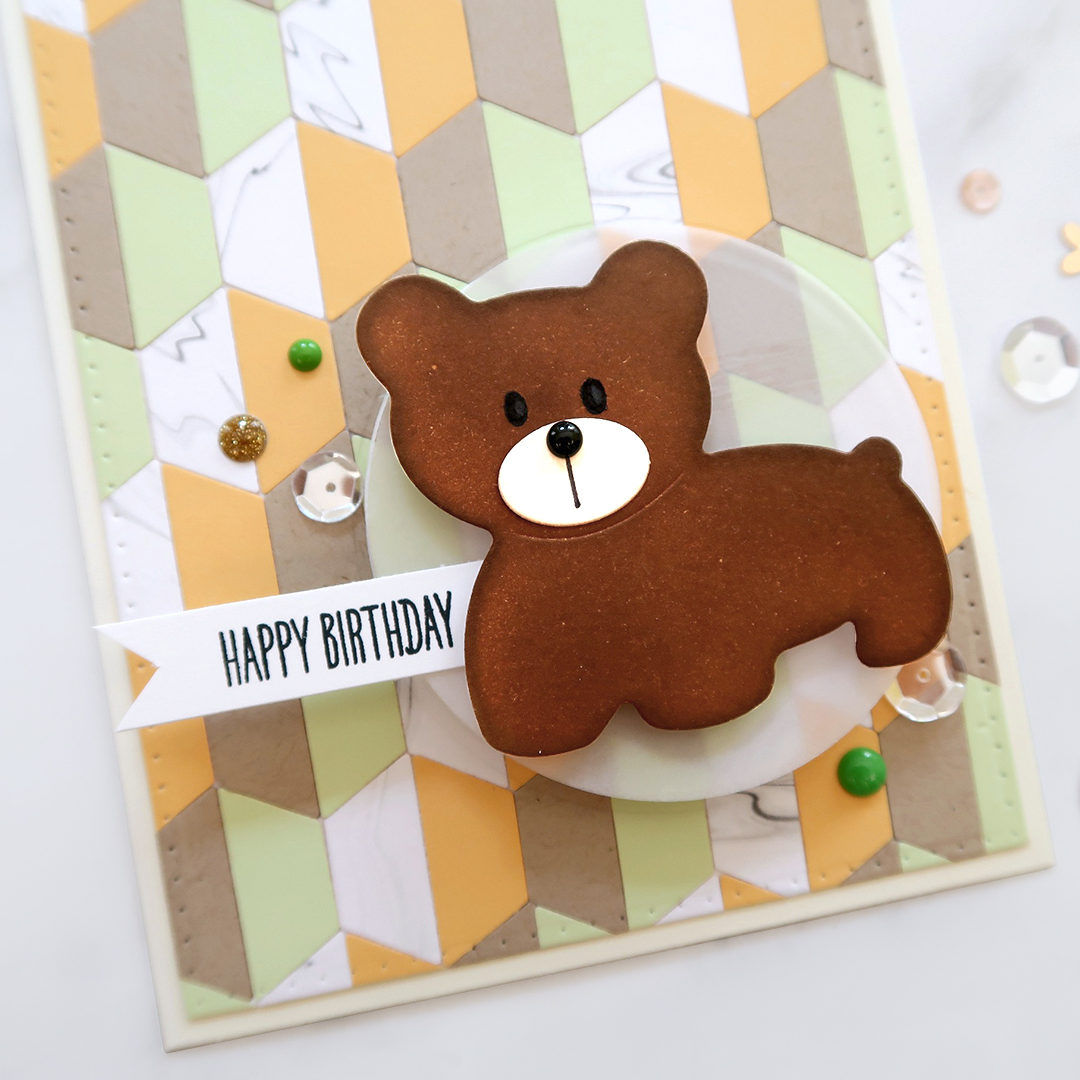
Hi everyone! I'm Laura Sterckx from makingcardsisfun.com and I'm excited to be sharing my first card and video on the Spellbinders blog as a Spellblogger! :) For today's blog post I made a cute birthday card for kids featuring the Half Hex Quilt dies from the Quilt It collection by Lene Lok along with the Bear Scout die from the My Little Red Wagon collection by Debi Adams.
 First I used the Half Hex Quilt dies from the Quilt It collection by Lene Lok to create my own patterned paper. To be honest with you, I have zero experience when it comes to quilting so I had to some research online. Thankfully the packaging of these dies shows a sample card on the front and a quick overview of the finished pattern on the back. For this particular card, I was inspired by the pattern Yana made using this same set! I mixed three different colors of card stock and some pretty marbled patterned paper. I recommend playing around with these dies and experiment with the different possibilities.
 Next it was time to add some cuteness to this card! I used Bear Scout Etched Die from the My Little Red Wagon Collection by Debi Adams. I simply die cut the image out of white card stock and added my color with Vintage Photo Distress Ink. However, you could just die cut it out of some brown card stock instead! For the bear's snout I colored some card stock with an E30 Copic Sketch Marker. To add some more details to this bear, I used a fine black pen and the die cut as a stencil for the bear and snout.
To add more dimension I die cut a circle out of the quilted patterned paper using Standard Circles SM Etched Dies set. I die cut the same circle three more times out of Fun Foam. Then I adhered those pieces together and stuck a vellum circle on top. This tones down that patterned and makes the bear pop! Finally I finished off this card with a stamped sentiment banner, enamel dots and some clear sequins.
That's it for my first post here on the Spellbinders blog. Thank you for joining me and I'll see you soon. I can't wait to hear your thoughts on this card and video! :)
Spellbinders supplies:
Next it was time to add some cuteness to this card! I used Bear Scout Etched Die from the My Little Red Wagon Collection by Debi Adams. I simply die cut the image out of white card stock and added my color with Vintage Photo Distress Ink. However, you could just die cut it out of some brown card stock instead! For the bear's snout I colored some card stock with an E30 Copic Sketch Marker. To add some more details to this bear, I used a fine black pen and the die cut as a stencil for the bear and snout.
To add more dimension I die cut a circle out of the quilted patterned paper using Standard Circles SM Etched Dies set. I die cut the same circle three more times out of Fun Foam. Then I adhered those pieces together and stuck a vellum circle on top. This tones down that patterned and makes the bear pop! Finally I finished off this card with a stamped sentiment banner, enamel dots and some clear sequins.
That's it for my first post here on the Spellbinders blog. Thank you for joining me and I'll see you soon. I can't wait to hear your thoughts on this card and video! :)
Spellbinders supplies:
 Next it was time to add some cuteness to this card! I used Bear Scout Etched Die from the My Little Red Wagon Collection by Debi Adams. I simply die cut the image out of white card stock and added my color with Vintage Photo Distress Ink. However, you could just die cut it out of some brown card stock instead! For the bear's snout I colored some card stock with an E30 Copic Sketch Marker. To add some more details to this bear, I used a fine black pen and the die cut as a stencil for the bear and snout.
To add more dimension I die cut a circle out of the quilted patterned paper using Standard Circles SM Etched Dies set. I die cut the same circle three more times out of Fun Foam. Then I adhered those pieces together and stuck a vellum circle on top. This tones down that patterned and makes the bear pop! Finally I finished off this card with a stamped sentiment banner, enamel dots and some clear sequins.
That's it for my first post here on the Spellbinders blog. Thank you for joining me and I'll see you soon. I can't wait to hear your thoughts on this card and video! :)
Spellbinders supplies:
Next it was time to add some cuteness to this card! I used Bear Scout Etched Die from the My Little Red Wagon Collection by Debi Adams. I simply die cut the image out of white card stock and added my color with Vintage Photo Distress Ink. However, you could just die cut it out of some brown card stock instead! For the bear's snout I colored some card stock with an E30 Copic Sketch Marker. To add some more details to this bear, I used a fine black pen and the die cut as a stencil for the bear and snout.
To add more dimension I die cut a circle out of the quilted patterned paper using Standard Circles SM Etched Dies set. I die cut the same circle three more times out of Fun Foam. Then I adhered those pieces together and stuck a vellum circle on top. This tones down that patterned and makes the bear pop! Finally I finished off this card with a stamped sentiment banner, enamel dots and some clear sequins.
That's it for my first post here on the Spellbinders blog. Thank you for joining me and I'll see you soon. I can't wait to hear your thoughts on this card and video! :)
Spellbinders supplies:























































































