Handmade Collection Inspiration | Hand Stitched Love Card by Jenny Colacicco
on July 08, 2018

Handmade Collection Inspiration | Hand Stitched Love Card by Jenny Colacicco

Hi everyone! It’s Jenny from JC Cards back again t​o share with you my final project showcasing the stamps and dies from the Handmade Collection​ ​by Stephanie Low. If you missed my previous two posts, you can find them ​here​ and here.​ My project today features the Sew and Creativity stamp and die sets.
Spellbinders - Handmade Collection by Stephanie Low - Inspiration | Hand Stitched Love Card by Jenny Colacicco #spellbinders #stamping #neverstopmaking

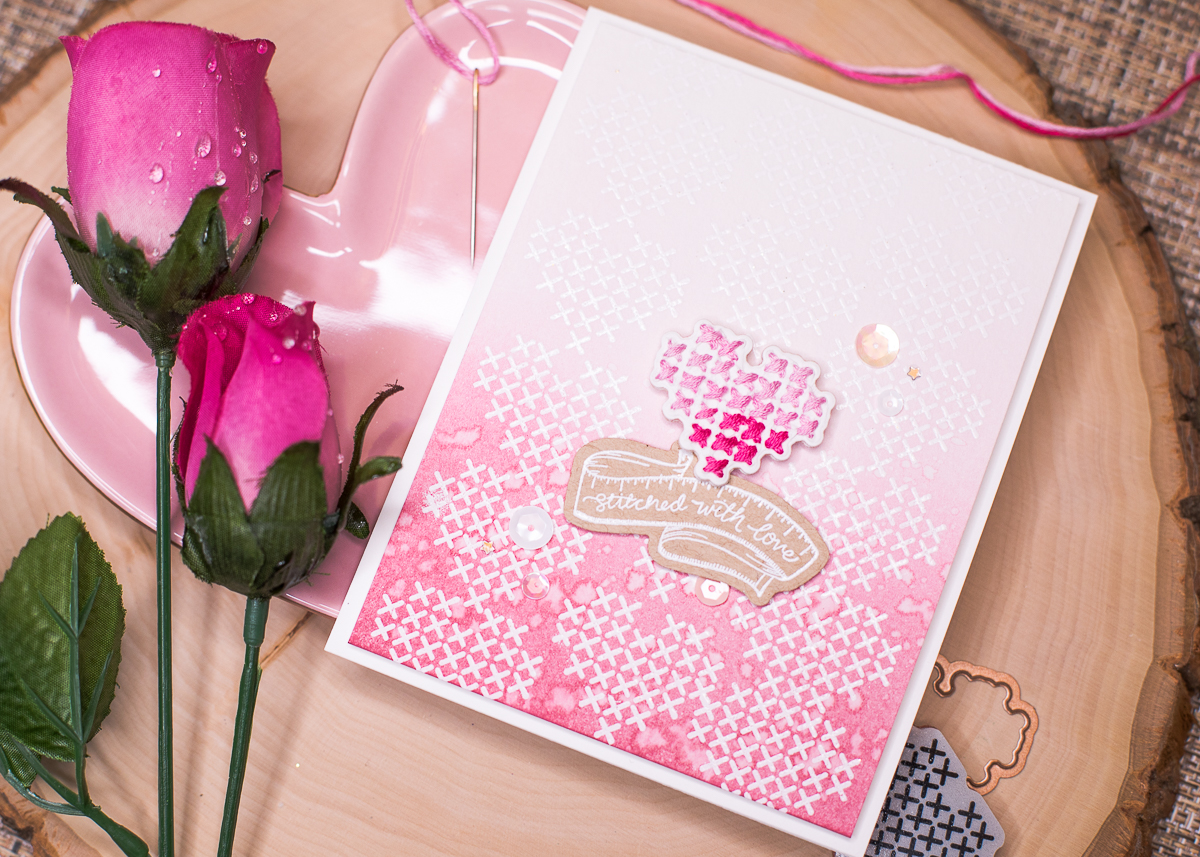
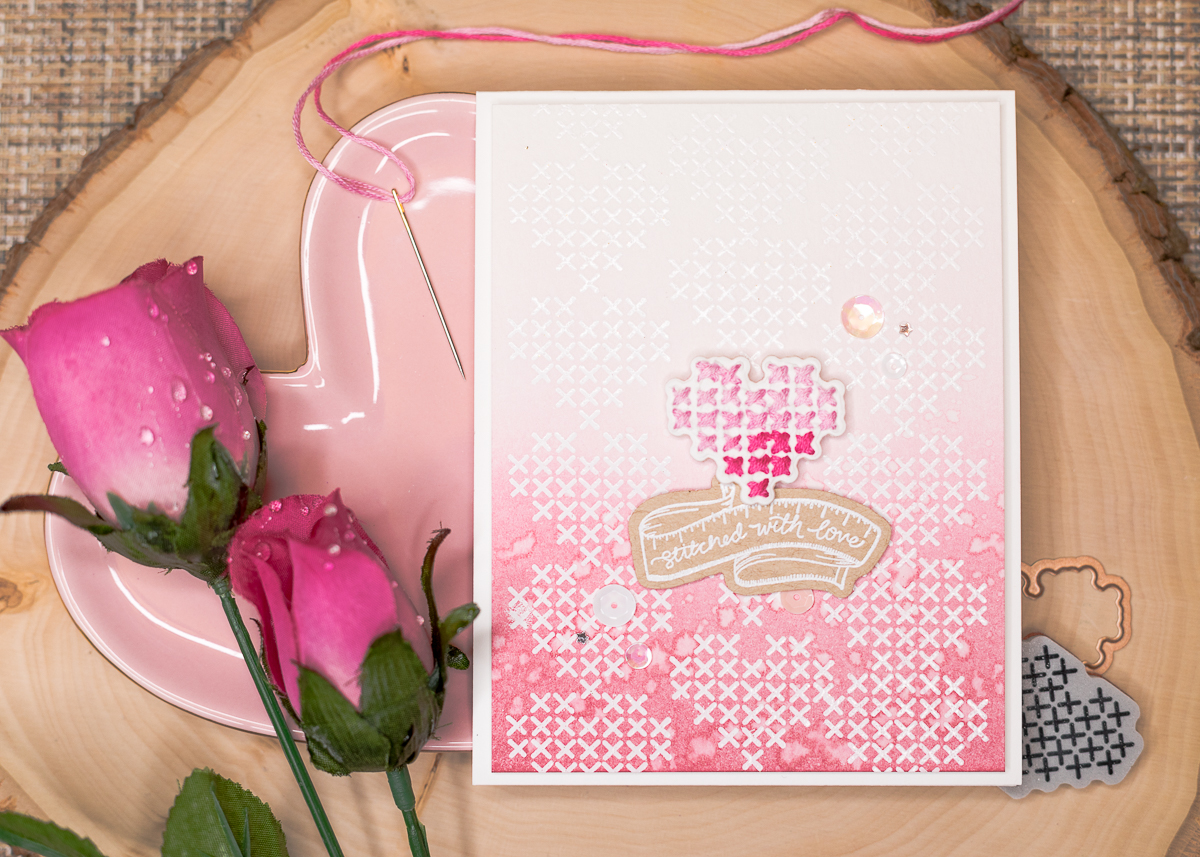
I really wanted my final project to feature a technique that was inspired by the collection itself, so I couldn’t resist adding some real (albeit very simple!) hand stitching to my card. For the background panel, I stamped the cross-stitch heart from the Creativity set multiple times in clear, sticky embossing ink onto a 4” x 5.25” panel of cold press watercolor cardstock (I love this for ink blending - it makes it much easier). I heat embossed each heart in white embossing powder in between so that I could more easily see to line up the next image. It’s not perfectly lined up, but I think that the images in the collection lend themselves to a more handmade look, so I think a little imperfection just adds to that overall feel!

Spellbinders - Handmade Collection by Stephanie Low - Inspiration | Hand Stitched Love Card by Jenny Colacicco #spellbinders #stamping #neverstopmaking

I ink blended a pale pink ink over the panel from the base, fading out towards the top. I then blended a darker pink ink from the base, fading out about half way up the panel. I added some flicks of water over the top for a distressed look. I love how ink blending brings out the heat embossed images as they resist the ink. I then mounted the panel onto a white card base with craft foam.

Spellbinders - Handmade Collection by Stephanie Low - Inspiration | Hand Stitched Love Card by Jenny Colacicco #spellbinders #stamping #neverstopmaking

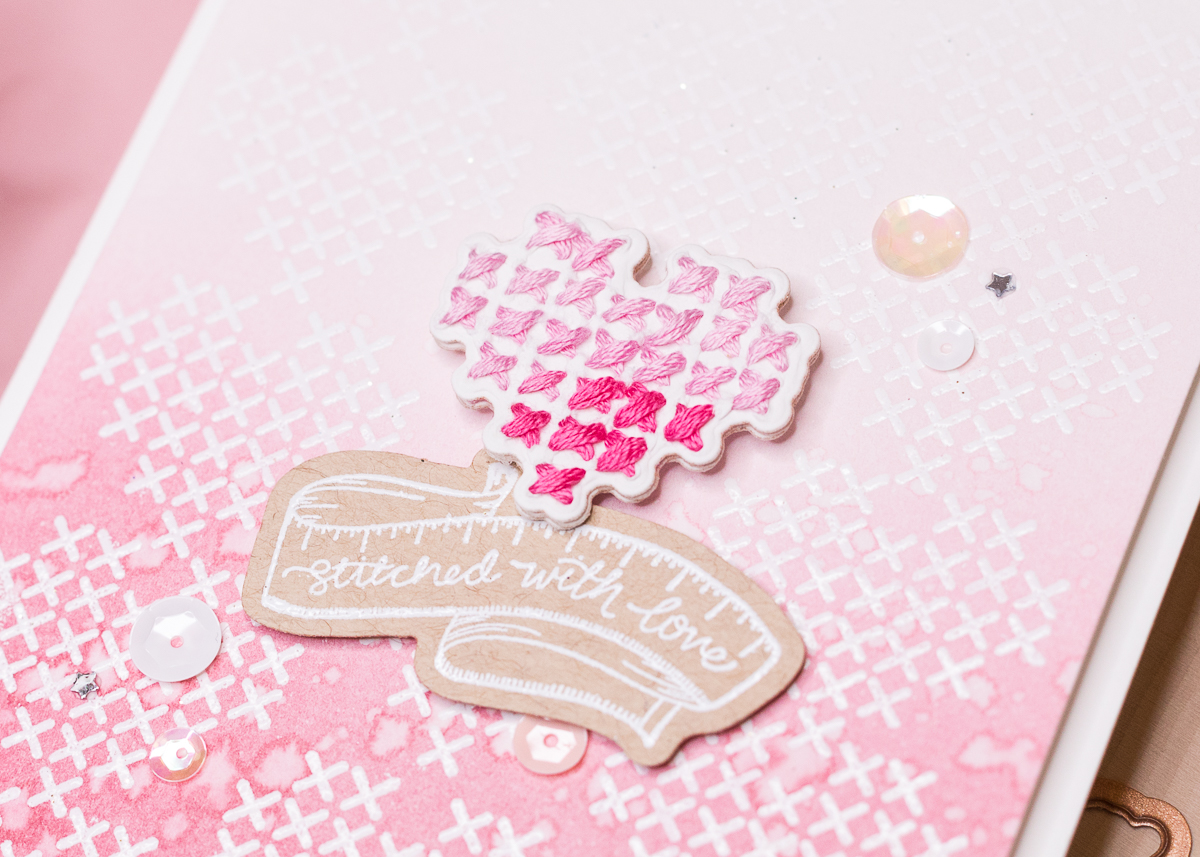
I stamped the heart image again onto white cardstock in a very pale ink and then used a craft pick to punch out holes to create my own cross stitch grid, using the stamped image as a guide. I then used pink ombre embroidery floss (6 strands) to stitch the heart. When complete, I used the coordinating die to cut it out, and also die cut another two hearts ,which I stacked together with liquid adhesive. I popped the heart up onto the card using foam squares. My sentiment is from the Sew set, and was heat embossed with white embossing powder onto a kraft cardstock, die cut out with the coordinating die and then popped up on a thinner foam tape to allow the heart to peep over the edge. For some finishing sparkle, I adhered some pale pink, white and silver star sequins.

Spellbinders Supplies:

Other supplies​​:

Cardstock: Neenah Solar White 110lb, Catherine Pooler Designs Sand Dunes, Canson XL 140lb Cold Press watercolor; Ink: Versamark, Catherine Pooler Designs Just A Girl and Rose Petals, Ink on 3 Fadeout; Embossing Powder: WOW! Opaque Bright White Superfine; Little Things by Lucy’s Tutu sequins mix, ombre pink embroidery floss, craft foam, craft pick, Scrapbook Adhesives foam squares. I think this was my favorite card to create from the series - adding a little bit of real stitching is so relaxing and I highly recommend it :) Please feel free to leave me a comment below if you have any questions. I hope you have been inspired by the projects I’ve created using the Handmade by Stephanie Low collection. I’ve certainly had a lot of fun and have been so inspired creating with it!

Leave a comment

Your email will not be published. Please note, comments need to be approved before they are published.

2 comments

Bonnie Tait,

These dies bing back so much goodness. The love of cross stitch is coming back . These dies are so intricate, lovely and elegant. Beautiful job well done on this card.

Sandy Sellers,

This is so cute. I used to cross stitch, and this stirs up the old juices :)


  • How to Make a Colorful Foiled Butterfly Card with Glimmer II

    BP-351

    How to Make a Colorful Foiled Butterfly Card with Glimmer II

    Combine hot foiling, alcohol-marker coloring, ink blending, and dimensional shaping to create a colorful butterfly card that sparkles from every angle. In this step-by-step tutorial, you’ll learn how to foil detailed butterflies and a floral background with the Glimmer II Hot Foil System, add bold color, and shape the butterfly wings for a realistic raised effect. The Bright Butterflies and Thanks In Bloom Press +...

  • How to Heat Emboss with BetterPress Plates: Snowman Christmas Card

    BP-001

    How to Heat Emboss with BetterPress Plates: Snowman Christmas Card

    BetterPress plates can do more than create letterpress impressions and hot-foiled designs. In this detailed Christmas card tutorial, you’ll learn how to apply clear sticky ink to a BetterPress plate and use white embossing powder to produce a crisp, heat-embossed snowflake background. The tutorial also covers pressing and die cutting a sentiment, assembling three detailed snowmen, and arranging the finished elements on an A2 card....

  • How to Use the Reverse Foiling Technique on a Colorful Window Card

    BP-001

    How to Use the Reverse Foiling Technique on a Colorful Window Card

    Create a bright, modern card while learning how to use the negative foil left behind after hot foiling. In this step-by-step tutorial, you’ll foil the detailed Windows with a View design, use a solid plate to reverse foil the remaining image, and turn selected windows into dimensional embellishments. An ink-blended striped background, BetterPress sentiment, and sparkling gems complete the design. This project is ideal for...