


Posted by Spellbinders Team
on May 17, 2017

Cardmaking is such a relaxing process. So today I, Elena Olinevich, show you how you can play with the papers and dies while creating beautiful background for your cards.
 I love using pink color as the main tone for my cards. So this time I mixed the papers and use the front and the backside paper from the same paper sheet for two different cards.
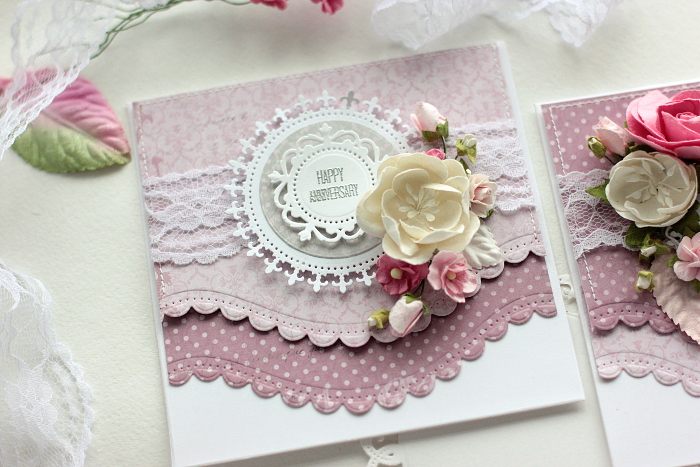
 I started with die cutting the papers using A2 Curved Borders Two Card Creator Etched Dies. What I've added - I die cut one more extra layer and topped one layer over.
 This scalloped edge looks nice, but in case to separate your two paper layers, I advice you to mount the upper layer on the foam pads. You will notice how it pops up from the background.
 To help to create a flower cluster I've added the circle using the Royal Circle Etched Dies.
For one card I used the two from the die set, one to make the lace look circle and the smaller one for my sentiment, that I heat embossed after stamping.
To help to create a flower cluster I've added the circle using the Royal Circle Etched Dies.
For one card I used the two from the die set, one to make the lace look circle and the smaller one for my sentiment, that I heat embossed after stamping.
 For my second card I used the same papers that I mixed by order.
 To place my sentiment I used my most often used die from Romantic Rectangles Two Edged Dies.
 To make the cards a bit different, I mixed not only the paper order, but mirrored the flowers as well.
 Actually it's quite easy to create many cards that look different using the same papers and embellishments. Now it's your turn to try .
Supplies:
Actually it's quite easy to create many cards that look different using the same papers and embellishments. Now it's your turn to try .
Supplies:
I started with die cutting the papers using A2 Curved Borders Two Card Creator Etched Dies. What I've added - I die cut one more extra layer and topped one layer over.
This scalloped edge looks nice, but in case to separate your two paper layers, I advice you to mount the upper layer on the foam pads. You will notice how it pops up from the background.
To help to create a flower cluster I've added the circle using the Royal Circle Etched Dies.
For one card I used the two from the die set, one to make the lace look circle and the smaller one for my sentiment, that I heat embossed after stamping.
For my second card I used the same papers that I mixed by order.
To place my sentiment I used my most often used die from Romantic Rectangles Two Edged Dies.
To make the cards a bit different, I mixed not only the paper order, but mirrored the flowers as well.
Actually it's quite easy to create many cards that look different using the same papers and embellishments. Now it's your turn to try .
Supplies:























































































