Posted by Hero Arts
on December 06, 2019

Today we are thrilled to announce a new addition to our amazing Creative Team! Channin has wow'ed us the past couple months as she's joined our monthly release blog hops - check out her December post HERE ! We're so excited to have her officially join our team!
Let's get to know Channin:

Hello! I’m Channin Pelletier and I live in sunny Arizona with my husband and our two sweet daughters. I’m a long time stamper and papercrafter. I actually started back in junior high with carving my own stamps from erasers for handmade cards and scrapbook pages. My current crafty obsession is definitely cardmaking!! It’s difficult for me to nail down my style, I’m bit of chameleon! I love clean and simple designs, coloring critters and flowers, and even constructing interactive cards! But overall I love trying to come up with designs that are unique or unexpected!
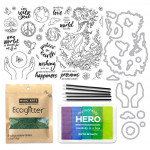
Today Channin is diving right in with a wonderful interactive card featuring the newly-released December My Monthly Hero kit , and a helpful how-to video. Take it away, Channin!
Hello, friends! It’s Channin here with my first video and post for Hero Arts!! I’m absolutely thrilled to joining this incredible team and to be given this opportunity to create and share with such amazing products!!

Today I have a fun interactive card using the
December My Monthly Hero Kit
! In today’s video I create a rotating wheel card that has a fun reveal with every turn! Please check out the video to see the process!
Watch below or on the
Hero Arts Youtube
channel.
First, I ink blended
Indigo
and
Navy
ink over an A2 panel and top-folding card base made from
Lapis
cardstock. I then splattered white Gansai Tambi paint over the panel and card base.

Next, I die cut a window from the panel using a circle die from the
kit
and a small notch using a larger circle die from the
Nesting Circle Infinity Dies
. I then die cut an even larger circle out of white cardstock and pierced a hole through the center of it and the small circle that I die cut from the
Lapis
.

I then fed a brad through both circles, starting with the small circle. Next, I added foam tape to the small circle then adhered both to the card base. I then temporarily placed the top panel over the wheel and traced the opening in the window, I then rotated the wheel and traced the opening again.

I repeated this process until I had four circles traced on the wheel. I then removed the panel, opened the brad and removed the large circle. Next, I stamped four images/sentiment from the kit inside each of the circles as well as the hands in
Intens-ified Black Ink
.

I then Copic colored the images in and die cut the hands out with the coordinating dies. Next, I added the large circle back to the brad and then adhered the top panel with foam tape. I then finished the card by adhering the hands around the window with foam tape.
I hope you enjoyed today’s card and video! Thank you so much for stopping by!
And thank YOU, Channin! We're so happy you're here!

|























































































13 comments
Great card. Thank you for sharing. My new kit just arrived; cant wait to start creating with it.
Excellent job in explaining the processes.
Thanks for the wheel reminder. Not a fan of this months kit, sorry, but really love your cards!! Can’t wait to see what next month brings!!
Welcome, Channin! What a beautiful and inspiring card you have created!
Congrats to Channin for becoming the newest member of the HA creative team! She is fantastic!