

Posted by Seeka SkyPaperScissors
on May 28, 2021

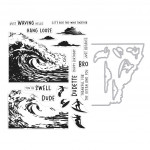
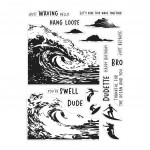
Hello and welcome! Seeka here and today I'm sharing two cards featuring the Barrel Waves HeroScape stamp set and coordinating dies (also available as a combo). With just a simple swap of colors, it's easy to change up this fun scene to fit any mood or time of day!

For my first card, a daytime scene, I began by placing the large wave layer stamp into a stamp positioning tool. I inked the entire stamp in Tide Pool Shadow Ink and stamped onto a 4.25" x 5.5" panel of Dove White cardstock. Then, to create the effect of darker water towards the bottom of the panel, I inked just the bottom portion of the stamp in Summer Sky Bold Ink and used a rag to dab at and soften the harsh edge of ink before stamping down onto the panel again.
Next, I positioned the second layer of the wave in the stamp positioning tool and inked up the entire stamp with Aquatic Bold Ink. I stamped down over the first layer and then used the coordinating die to cut out the image.
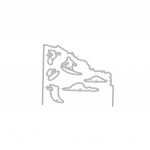
I created simple clouds by using the two cloud dies in the coordinating die set to cut three clouds out of white cardstock.
Next, I prepared the background by using a blending brush to blend Splash Reactive Ink over the top part of a 4.25" x 5.5" panel of Arctic cardstock. I stamped the sentiment in Onyx Pigment Ink.
To assemble the card, I used foam tape to adhere the wave and clouds onto the sky background, and then I adhered the card front to a top-folding card base.

My second card features the same elements but uses additional colors to create a dusk scene.

I used the same partial-inking technique to stamp the first layer of the wave, this time using Tangerine Bold Ink to ink up just the very top edge of the wave and again using a rag to dab up any stray ink before stamping down onto my cardstock panel. Then, I inked up the bottom portion of the same layer with Tide Pool and stamped again.
For the second layer, I inked the entire stamp using Summer Sky and stamped down onto the panel. Then I selectively inked up the bottom left and right corners with Aquatic ink, using the rag to soften any harsh links of ink, and stamped down again. I stamped the surfer in Onyx Pigment Ink and then used the coordinating die to cut out the image.
To create the background, I used foam blending tools to blend Fruit Punch, Creamsicle, and Lemon Drop Reactive Inks onto a 4.25" x 5.5" panel of bristol smooth cardstock. I blended the colors where they overlapped using small circular motions and then switched to a light tamping motion to fine tune the blending. Then, I stamped the sentiment in Onyx Pigment Ink.
While the background was drying, I cut out four clouds from bristol smooth cardstock and used the same blending tools to add a bit of red and orange ink to the bottom of the clouds. To keep the color soft and light, I didn't re-ink the blending tools; I just used whatever link was left from blending the background.

To assemble the card, I used glue dots to adhere two clouds to the background and then used foam tape to adhere the two remaining clouds. I trimmed off the ends of the clouds that hung off the background. Next, I adhered the wave with foam tape and finished off by adhere the card front to a top-folding card base.
Thank you so much for visiting!

Click on products to shop:
|























































































2 comments
Beautiful cards. I love the way you colored the sunset clouds.
Gorgeous Seeka, I love them both. Great idea to make the second card a dusk scene.
Thank you so much for sharing, stay safe and have a wonderful week.