Posted by Mindy Eggen
on November 28, 2022

Hey crafty friends! This is Mindy with you today to share inspiration using the Poinsettia Flowers Bold Prints background stamp. I also have a video tutorial that you can view down below or HERE on the Hero Arts YouTube channel.
While this background is beautiful for coloring or ink blending, I'm going to show you a quick and easy way to use it on your holiday cards.
I start the card by stamping the background in Intensified Black ink onto Deluxe Smooth White cardstock. This background could seem a bit overwhelming when stamped in black so I have a trick for you!

We are going to break up the background a little by adding strips of cardstock. This also gives the eye a place to rest. The colors I'm using are Peony , Cherry , Cranberry , Shamrock , Meadow and Kiwi . I'm trimming these down to 1/4" strips and will adhere them to thin cardstock or copy paper using my Precision Glue .

I'll trim off the excess white cardstock and adhere this panel to my stamped card front using the Precision Glue once again. I originally planned to have this going straight across the panel but decided it would be fun to put it on an angle.
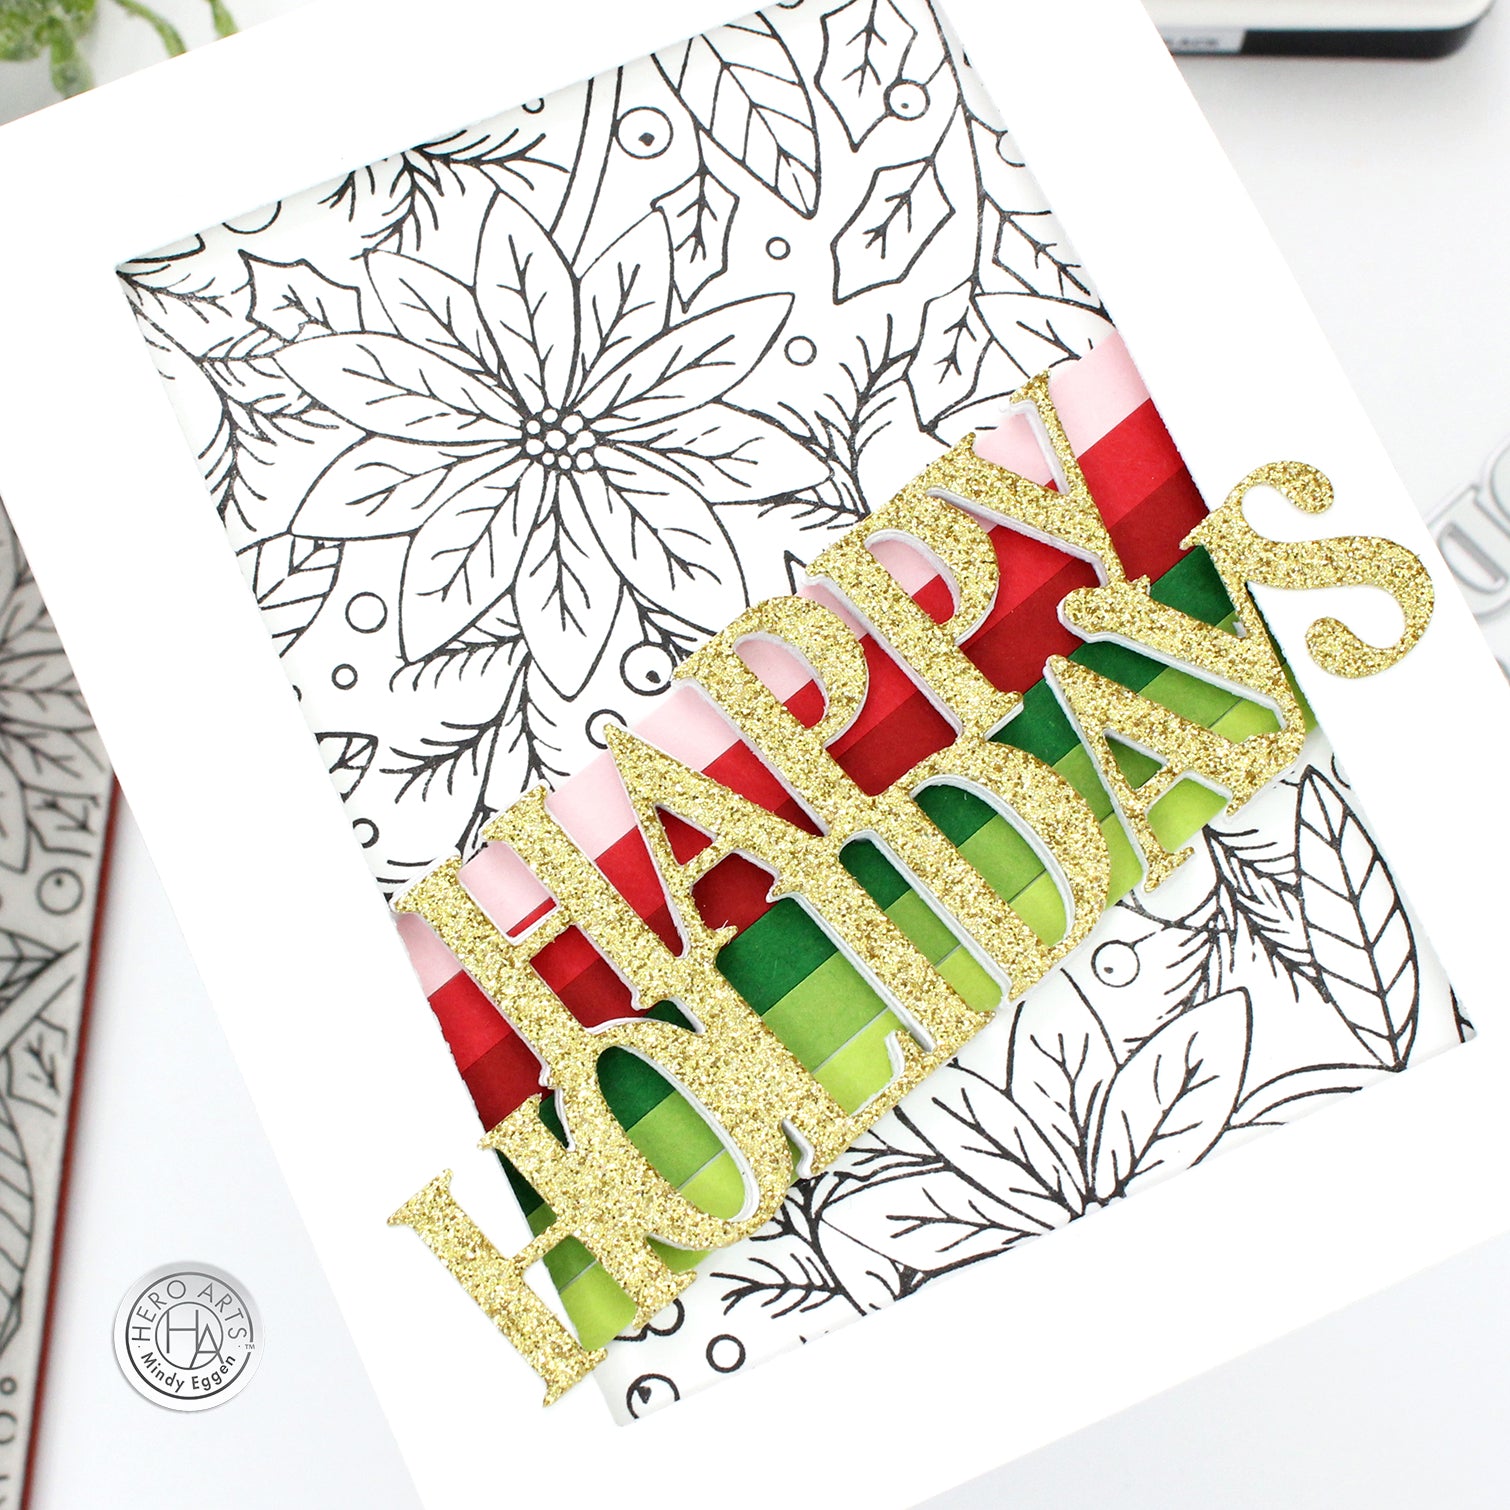
Next, I added a border. I created my border using the Nested Rectangle Infinity Die and Deluxe White cardstock. I added foam tape behind my border and adhered it to the card front.
Now comes the sentiment which I'll admit took me a while to decide on. A thin strip sentiment didn't seem like enough so I dug through my stash and found the Christmas Holidays Stamp & Cut XL which had this large Happy Holidays that happened to fit perfectly across the card.

I added 4-5 layers of white cardstock behind my sentiment to stack it up and make it flush with my white border. The top layer I created with Gold Glitter Pape r because why not add some sparkle? Then I added this right over the top of my colored strips. I obviously didn't plan it this way, but the height of the sentiment matched my strips perfectly!
I'm pretty excited with how this turned out and now that I have an example to go off of, I can mass produce these.
Hope you enjoyed today's inspiration!

|























































































