
3D Holiday Vignettes Inspiration | Christmas Decor by Mallika Kejriwal
on August 23, 2019

3D Holiday Vignettes Inspiration | Christmas Decor by Mallika Kejriwal

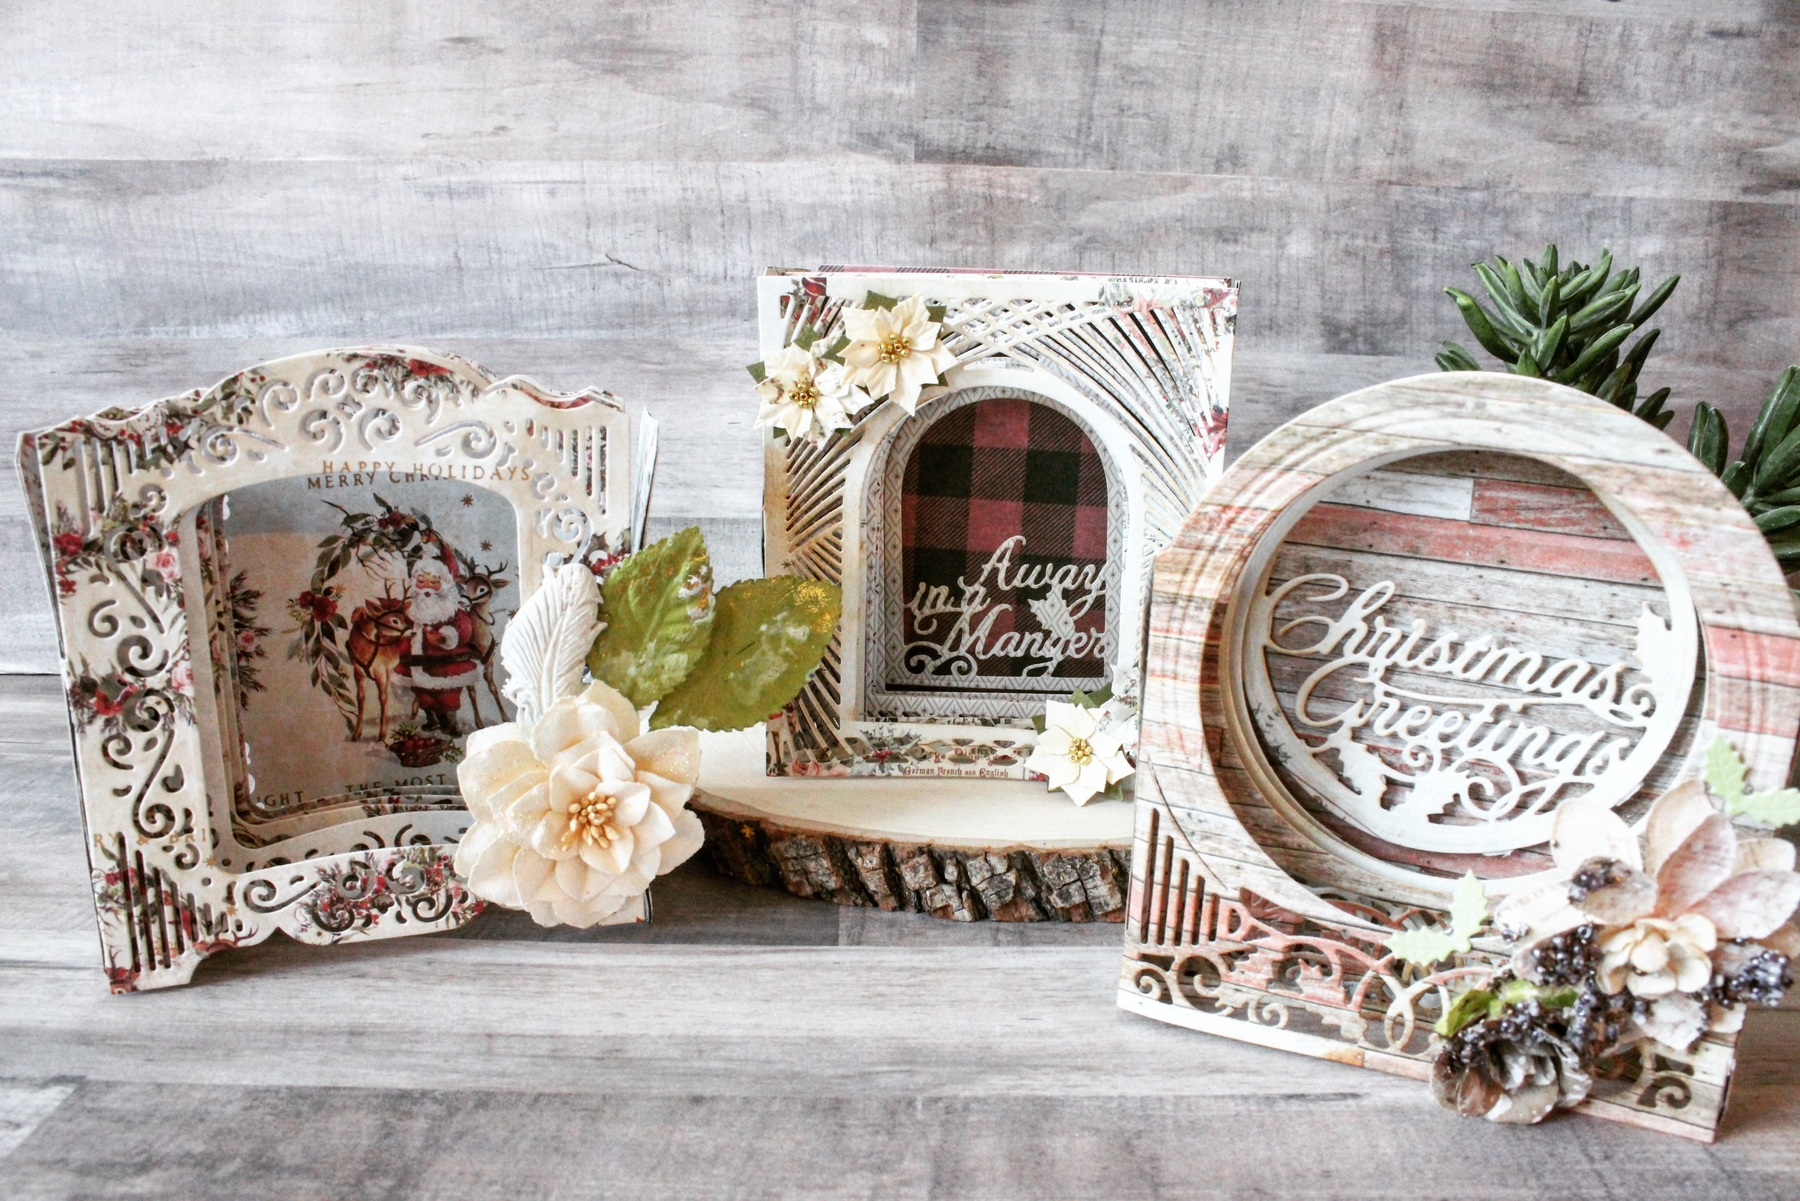
Hello Everyone, my name is Mallika Kejriwal and I am guest designing for Spellbinders this month using the beautiful 3D Holiday Vignettes by Becca Feeken. I am from Chicago and I work full time as a coder for a tech company and part time as a crafter. I run a YouTube channel called Aola DIY where I teach shabby chic, vintage inspired mixed media crafts. Today I’ll be sharing my interpretation of beautiful 3D Holiday Vignettes Collection. I have made some 3D object using this collection to adorn my Holiday curation table.
Spellbinders 3D Holiday Vignettes Collection by Becca Feeken - Inspiration | Christmas Decor by Mallika Kejriwal

When I started cutting my die cuts from this collection, I was just amazed by how many possibilities can be bought to life using the same set of dies. It just baffled me that beautifully intricacy of dies was maintained!

Spellbinders 3D Holiday Vignettes Collection by Becca Feeken - Inspiration | Christmas Decor by Mallika Kejriwal

I made these 3D objects and best part if I want I can attach a string and convert them into an ornament. They are super versatile and look more gorgeous if made them using your favorite Christmas collection.

Spellbinders 3D Holiday Vignettes Collection by Becca Feeken - Inspiration | Christmas Decor by Mallika Kejriwal

These 3D object can actually be folded flat and stored in an envelope for easy transportation. In case you all are looking for a perfect 3D sort of still 2d collection, this is the one!

Spellbinders 3D Holiday Vignettes Collection by Becca Feeken - Inspiration | Christmas Decor by Mallika Kejriwal

Spellbinders Supplies:

Other Supplies

Texture paste, Spatula, Distress ink and tool, Flowers, Beads and Glitters I hope you all have enjoyed my version of playing with beautiful spellbinders dies. If you love mixed media do visit me on my Instagram or YouTube. Have a wonderful day, Mallika

Leave a comment

Your email will not be published. Please note, comments need to be approved before they are published.

3 comments

Annette Reed,

These are beautiful!

Beverly Jordan,

These are such stunning pieces!!! Love the patterned papers that bring out the gorgeousness of these dies!

Becky Green,

BEAUTIFUL WORK!!! ;)<3


  • How to Make a Colorful Foiled Butterfly Card with Glimmer II

    BP-351

    How to Make a Colorful Foiled Butterfly Card with Glimmer II

    Combine hot foiling, alcohol-marker coloring, ink blending, and dimensional shaping to create a colorful butterfly card that sparkles from every angle. In this step-by-step tutorial, you’ll learn how to foil detailed butterflies and a floral background with the Glimmer II Hot Foil System, add bold color, and shape the butterfly wings for a realistic raised effect. The Bright Butterflies and Thanks In Bloom Press +...

  • How to Heat Emboss with BetterPress Plates: Snowman Christmas Card

    BP-001

    How to Heat Emboss with BetterPress Plates: Snowman Christmas Card

    BetterPress plates can do more than create letterpress impressions and hot-foiled designs. In this detailed Christmas card tutorial, you’ll learn how to apply clear sticky ink to a BetterPress plate and use white embossing powder to produce a crisp, heat-embossed snowflake background. The tutorial also covers pressing and die cutting a sentiment, assembling three detailed snowmen, and arranging the finished elements on an A2 card....

  • How to Use the Reverse Foiling Technique on a Colorful Window Card

    BP-001

    How to Use the Reverse Foiling Technique on a Colorful Window Card

    Create a bright, modern card while learning how to use the negative foil left behind after hot foiling. In this step-by-step tutorial, you’ll foil the detailed Windows with a View design, use a solid plate to reverse foil the remaining image, and turn selected windows into dimensional embellishments. An ink-blended striped background, BetterPress sentiment, and sparkling gems complete the design. This project is ideal for...






























