
Baby Girl Scrapbook Album Cover with Die-Cutting and Stitching
on September 20, 2017

Baby Girl Scrapbook Album Cover with Die-Cutting and Stitching

Hello Everyone, Elena here to show you how die-cutting and stitching can be beautifully combined together, using etched die sets from the NEW Chantilly Paper Lace Collection by Becca Feeken. I love the look of stitched covers on my scrapbook albums - stitching looks more attractive and it's feels great to the touch. I decided to create a shabby baby girl scrapbook for my friend's daughter, and I picked these etched die sets for it.
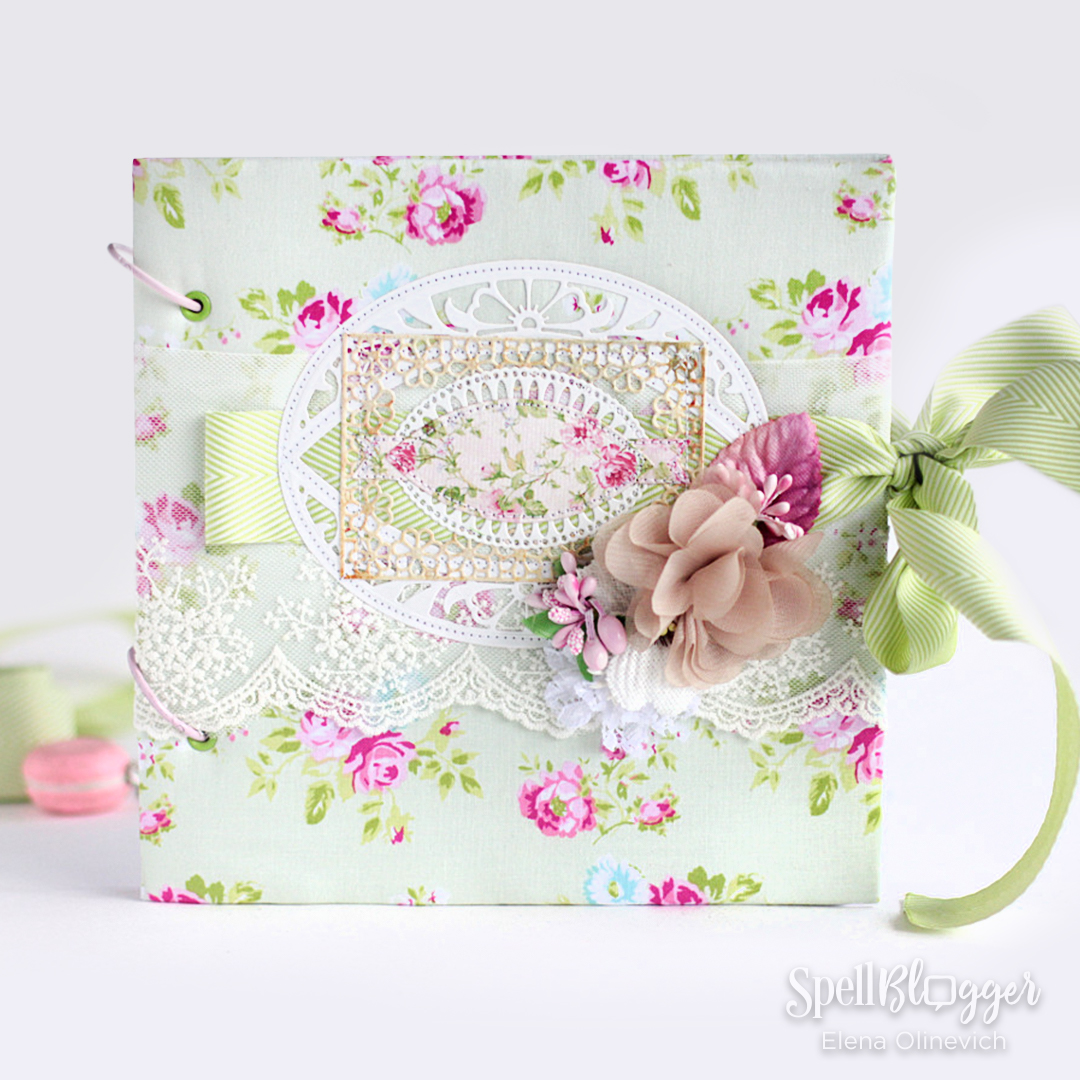
Baby Girl Scrapbook Album Cover with Die-Cutting and Stitching by Elena Olinevich for Spellbinders

This is the base of the cover's focal point...don't you love the combination? Let me show you more...

Baby Girl Scrapbook Album Cover with Die-Cutting and Stitching by Elena Olinevich for Spellbinders

I started with stitching the Frame from Bella Rose Lattice Layering Frame Large Set to my fabric cover, that I topped on the lace and twill ribbon. The stitching helps to fix the die cut, and it saves the delicate parts of it from getting damaged.

Baby Girl Scrapbook Album Cover with Die-Cutting and Stitching by Elena Olinevich for Spellbinders

Then I added the floral frame from the Tallulah Frill Layering Frame Small Set, and topped it with the small oval frame from the Hannah Elise Layering Frame Small Set. One more stitching is needed, moreover I suggest you to stitch the angles of the frame too, since the die cut is so intricate and can be fragile while holding it.

Baby Girl Scrapbook Album Cover with Die-Cutting and Stitching by Elena Olinevich for Spellbinders

The last die cut that I've added was the oval banner from the Bella Rose Lattice Layering Frame Large Set. I cut it out from the floral sheet of paper and stitched it to the layers too. For the finishing touches, I embellished everything with lace and tulle flowers. Supplies: If you enjoy stitching as much as I do I encourage you to try some of your favorite dies on the fabric!

Leave a comment

Your email will not be published. Please note, comments need to be approved before they are published.


  • HOW TO USE PRESS PLATES WITH MULTIPLE INKS | CREATE YOUR WAY HOLIDAY, BPR-050, BPI-049, BPI-003

    BP-001

    How to Use Multiple Ink Colors with BetterPress Registration Plates

    Create a colorful Christmas card while learning how to apply multiple ink colors to BetterPress registration plates. In this detailed tutorial, you’ll use the Festive Evergreens Registration Press + Foil Plate & Die Set to press a holiday doorway scene in three colors, combining the built-in registration system with a simple masking technique. The registration template positions the coordinating plates so each layer aligns with...

  • How to Make a Colorful Foiled Butterfly Card with Glimmer II

    BP-351

    How to Make a Colorful Foiled Butterfly Card with Glimmer II

    Combine hot foiling, alcohol-marker coloring, ink blending, and dimensional shaping to create a colorful butterfly card that sparkles from every angle. In this step-by-step tutorial, you’ll learn how to foil detailed butterflies and a floral background with the Glimmer II Hot Foil System, add bold color, and shape the butterfly wings for a realistic raised effect. The Bright Butterflies and Thanks In Bloom Press +...

  • How to Heat Emboss with BetterPress Plates: Snowman Christmas Card

    BP-001

    How to Heat Emboss with BetterPress Plates: Snowman Christmas Card

    BetterPress plates can do more than create letterpress impressions and hot-foiled designs. In this detailed Christmas card tutorial, you’ll learn how to apply clear sticky ink to a BetterPress plate and use white embossing powder to produce a crisp, heat-embossed snowflake background. The tutorial also covers pressing and die cutting a sentiment, assembling three detailed snowmen, and arranging the finished elements on an A2 card....































