Handmade Collection Inspiration | Hand Stitched Love Card by Jenny Colacicco
on July 08, 2018

Handmade Collection Inspiration | Hand Stitched Love Card by Jenny Colacicco

Hi everyone! It’s Jenny from JC Cards back again t​o share with you my final project showcasing the stamps and dies from the Handmade Collection​ ​by Stephanie Low. If you missed my previous two posts, you can find them ​here​ and here.​ My project today features the Sew and Creativity stamp and die sets.
Spellbinders - Handmade Collection by Stephanie Low - Inspiration | Hand Stitched Love Card by Jenny Colacicco #spellbinders #stamping #neverstopmaking

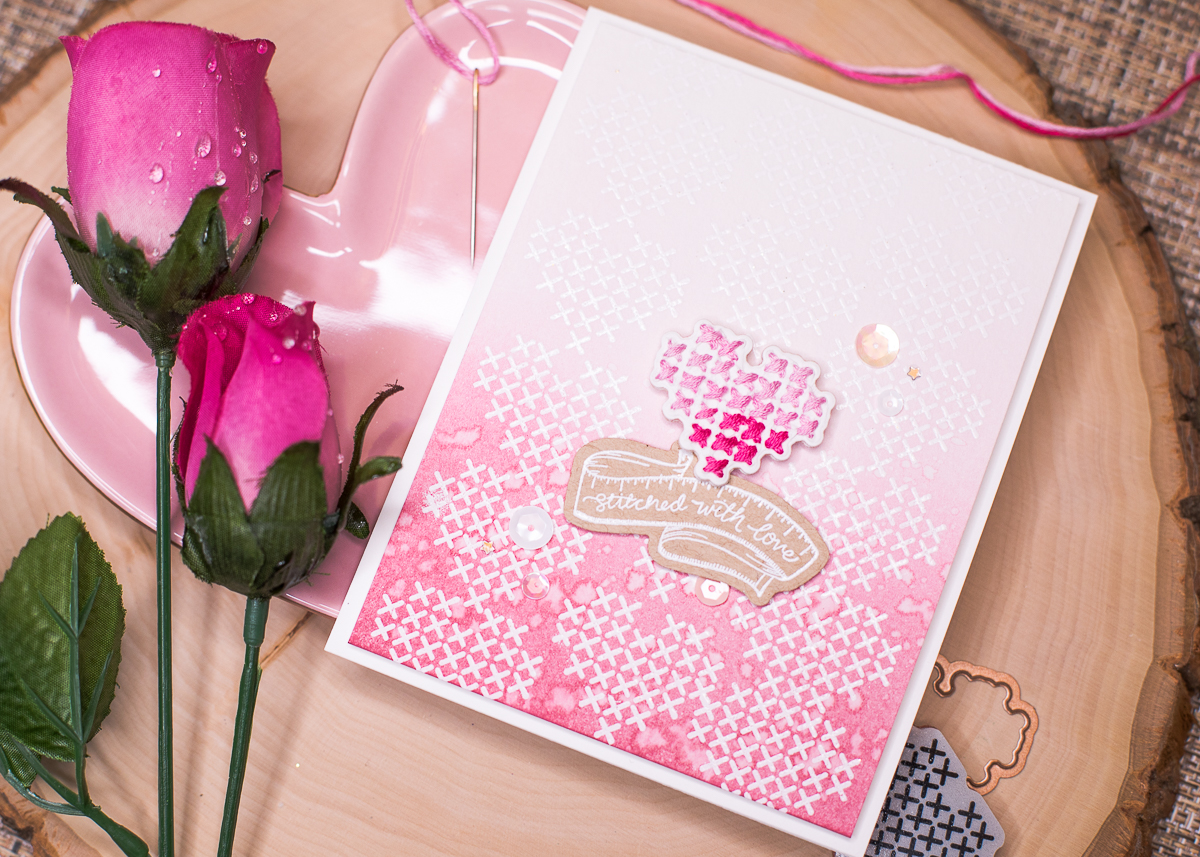
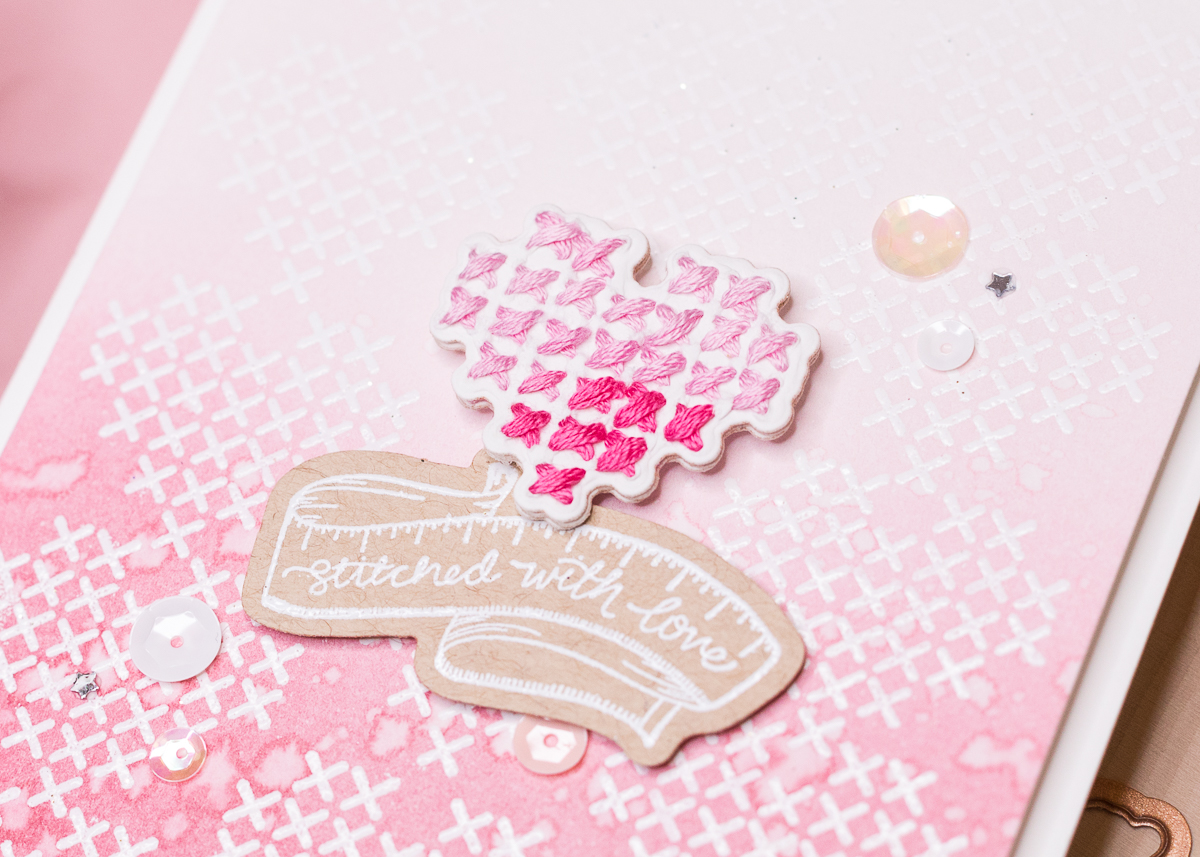
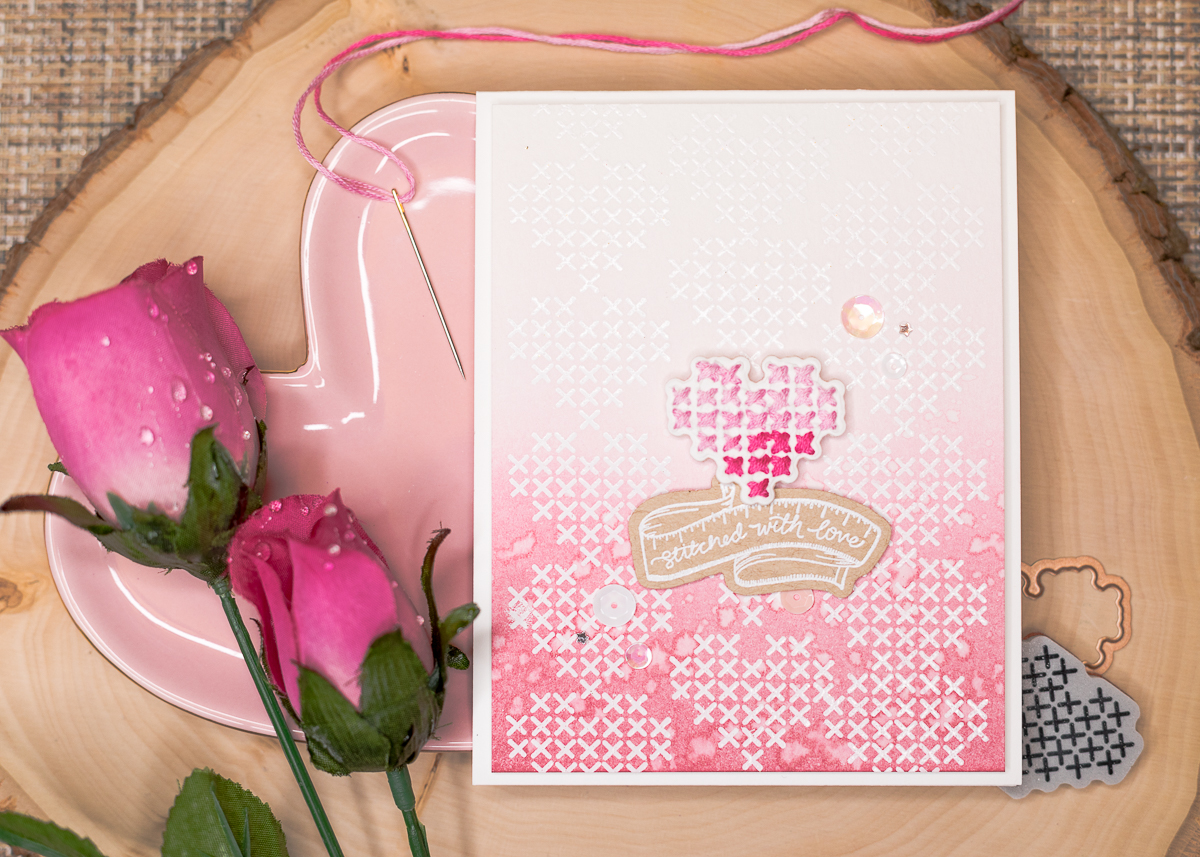
I really wanted my final project to feature a technique that was inspired by the collection itself, so I couldn’t resist adding some real (albeit very simple!) hand stitching to my card. For the background panel, I stamped the cross-stitch heart from the Creativity set multiple times in clear, sticky embossing ink onto a 4” x 5.25” panel of cold press watercolor cardstock (I love this for ink blending - it makes it much easier). I heat embossed each heart in white embossing powder in between so that I could more easily see to line up the next image. It’s not perfectly lined up, but I think that the images in the collection lend themselves to a more handmade look, so I think a little imperfection just adds to that overall feel!

Spellbinders - Handmade Collection by Stephanie Low - Inspiration | Hand Stitched Love Card by Jenny Colacicco #spellbinders #stamping #neverstopmaking

I ink blended a pale pink ink over the panel from the base, fading out towards the top. I then blended a darker pink ink from the base, fading out about half way up the panel. I added some flicks of water over the top for a distressed look. I love how ink blending brings out the heat embossed images as they resist the ink. I then mounted the panel onto a white card base with craft foam.

Spellbinders - Handmade Collection by Stephanie Low - Inspiration | Hand Stitched Love Card by Jenny Colacicco #spellbinders #stamping #neverstopmaking

I stamped the heart image again onto white cardstock in a very pale ink and then used a craft pick to punch out holes to create my own cross stitch grid, using the stamped image as a guide. I then used pink ombre embroidery floss (6 strands) to stitch the heart. When complete, I used the coordinating die to cut it out, and also die cut another two hearts ,which I stacked together with liquid adhesive. I popped the heart up onto the card using foam squares. My sentiment is from the Sew set, and was heat embossed with white embossing powder onto a kraft cardstock, die cut out with the coordinating die and then popped up on a thinner foam tape to allow the heart to peep over the edge. For some finishing sparkle, I adhered some pale pink, white and silver star sequins.

Spellbinders Supplies:

Other supplies​​:

Cardstock: Neenah Solar White 110lb, Catherine Pooler Designs Sand Dunes, Canson XL 140lb Cold Press watercolor; Ink: Versamark, Catherine Pooler Designs Just A Girl and Rose Petals, Ink on 3 Fadeout; Embossing Powder: WOW! Opaque Bright White Superfine; Little Things by Lucy’s Tutu sequins mix, ombre pink embroidery floss, craft foam, craft pick, Scrapbook Adhesives foam squares. I think this was my favorite card to create from the series - adding a little bit of real stitching is so relaxing and I highly recommend it :) Please feel free to leave me a comment below if you have any questions. I hope you have been inspired by the projects I’ve created using the Handmade by Stephanie Low collection. I’ve certainly had a lot of fun and have been so inspired creating with it!

Leave a comment

Your email will not be published. Please note, comments need to be approved before they are published.

2 comments

Bonnie Tait,

These dies bing back so much goodness. The love of cross stitch is coming back . These dies are so intricate, lovely and elegant. Beautiful job well done on this card.

Sandy Sellers,

This is so cute. I used to cross stitch, and this stirs up the old juices :)


  • How to Make a Foiled Ornament Christmas Card

    BP-001

    How to Make a Foiled Ornament Christmas Card

    Looking for a festive Christmas card that combines hot foiling, stenciling, and letterpress techniques? This colorful holiday project features a softly shaded ornament, a pressed sentiment, layered arch panels, and shimmering gold snowflakes. The Tied With Cheer BetterPress plate and stencil set makes it easy to coordinate the ornament imagery and greeting, while the Winter Peace plate creates an elegant foiled background. In this step-by-step...

  • HOW TO USE PRESS PLATES WITH MULTIPLE INKS | CREATE YOUR WAY HOLIDAY, BPR-050, BPI-049, BPI-003

    BP-001

    How to Use Multiple Ink Colors with BetterPress Registration Plates

    Create a colorful Christmas card while learning how to apply multiple ink colors to BetterPress registration plates. In this detailed tutorial, you’ll use the Festive Evergreens Registration Press + Foil Plate & Die Set to press a holiday doorway scene in three colors, combining the built-in registration system with a simple masking technique. The registration template positions the coordinating plates so each layer aligns with...

  • How to Make a Colorful Foiled Butterfly Card with Glimmer II

    BP-351

    How to Make a Colorful Foiled Butterfly Card with Glimmer II

    Combine hot foiling, alcohol-marker coloring, ink blending, and dimensional shaping to create a colorful butterfly card that sparkles from every angle. In this step-by-step tutorial, you’ll learn how to foil detailed butterflies and a floral background with the Glimmer II Hot Foil System, add bold color, and shape the butterfly wings for a realistic raised effect. The Bright Butterflies and Thanks In Bloom Press +...