Hello Summer Inspiration | Starry Night Cards with Jung AhSang
Posted by Spellbinders Team on June 25, 2019

Hello Summer Inspiration | Starry Night Cards with Jung AhSang

Hello crafty friends! My name is Jung AhSang, and I am so excited to be returning with another guest post on the Spellbinders blog. If you’d like to follow my crafty projects, my blog is jungahsang.wordpress.com. Also, I have a coordinating YT process video of my first card if you’re interested! When I saw the products in the Hello Summer & Starry Night collections, I immediately knew I had to make an ocean themed card, galaxy card, and a shaker card.

Hello Summer Inspiration | Starry Night Cards with Jung AhSang

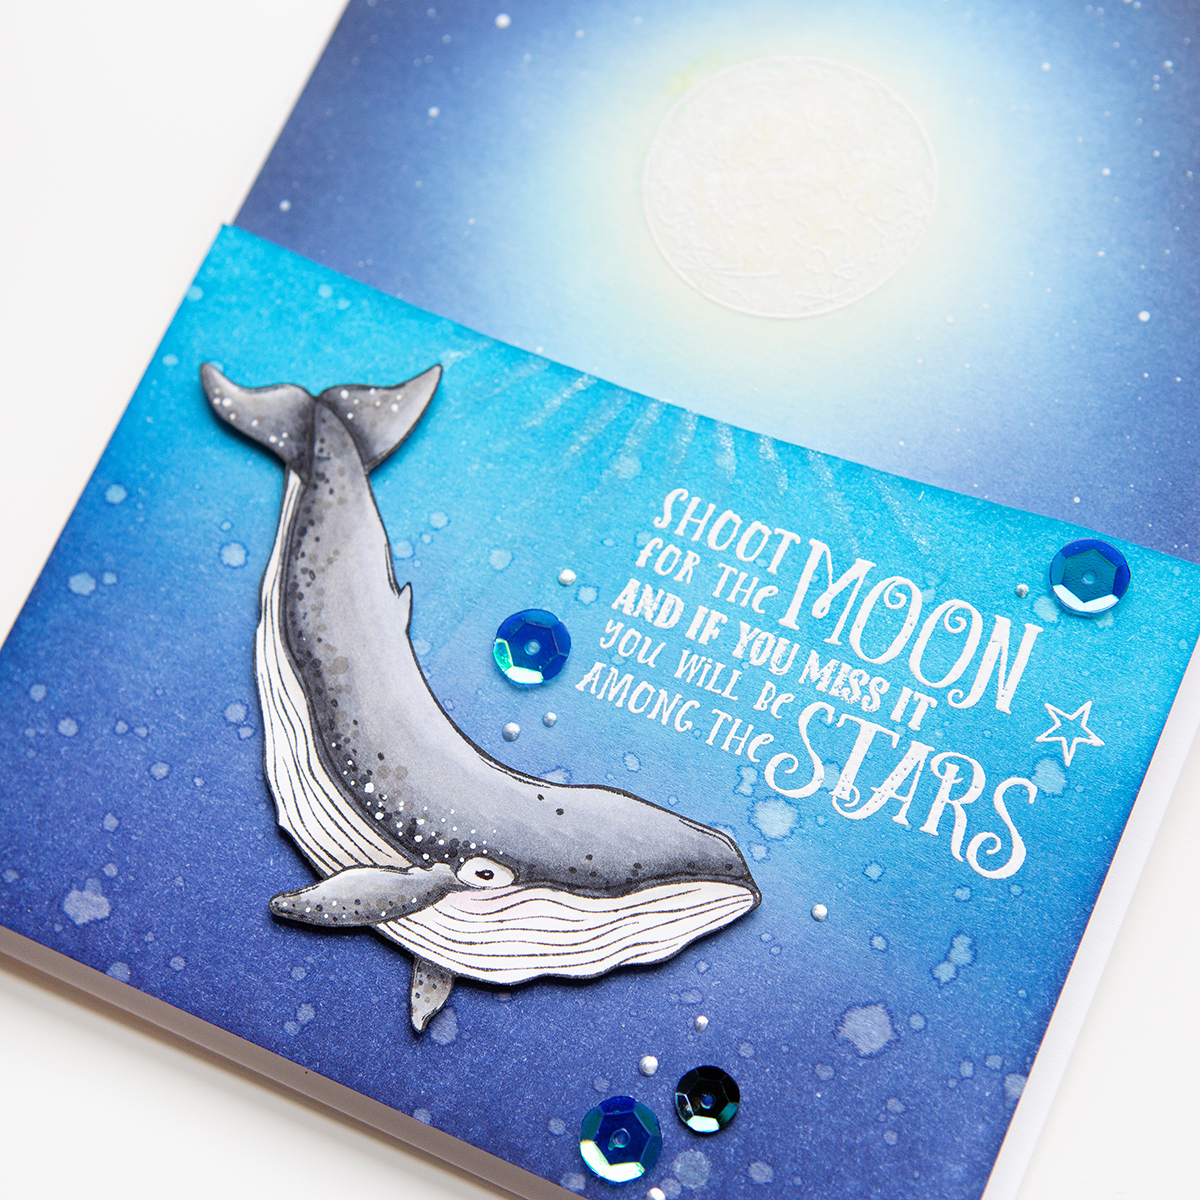
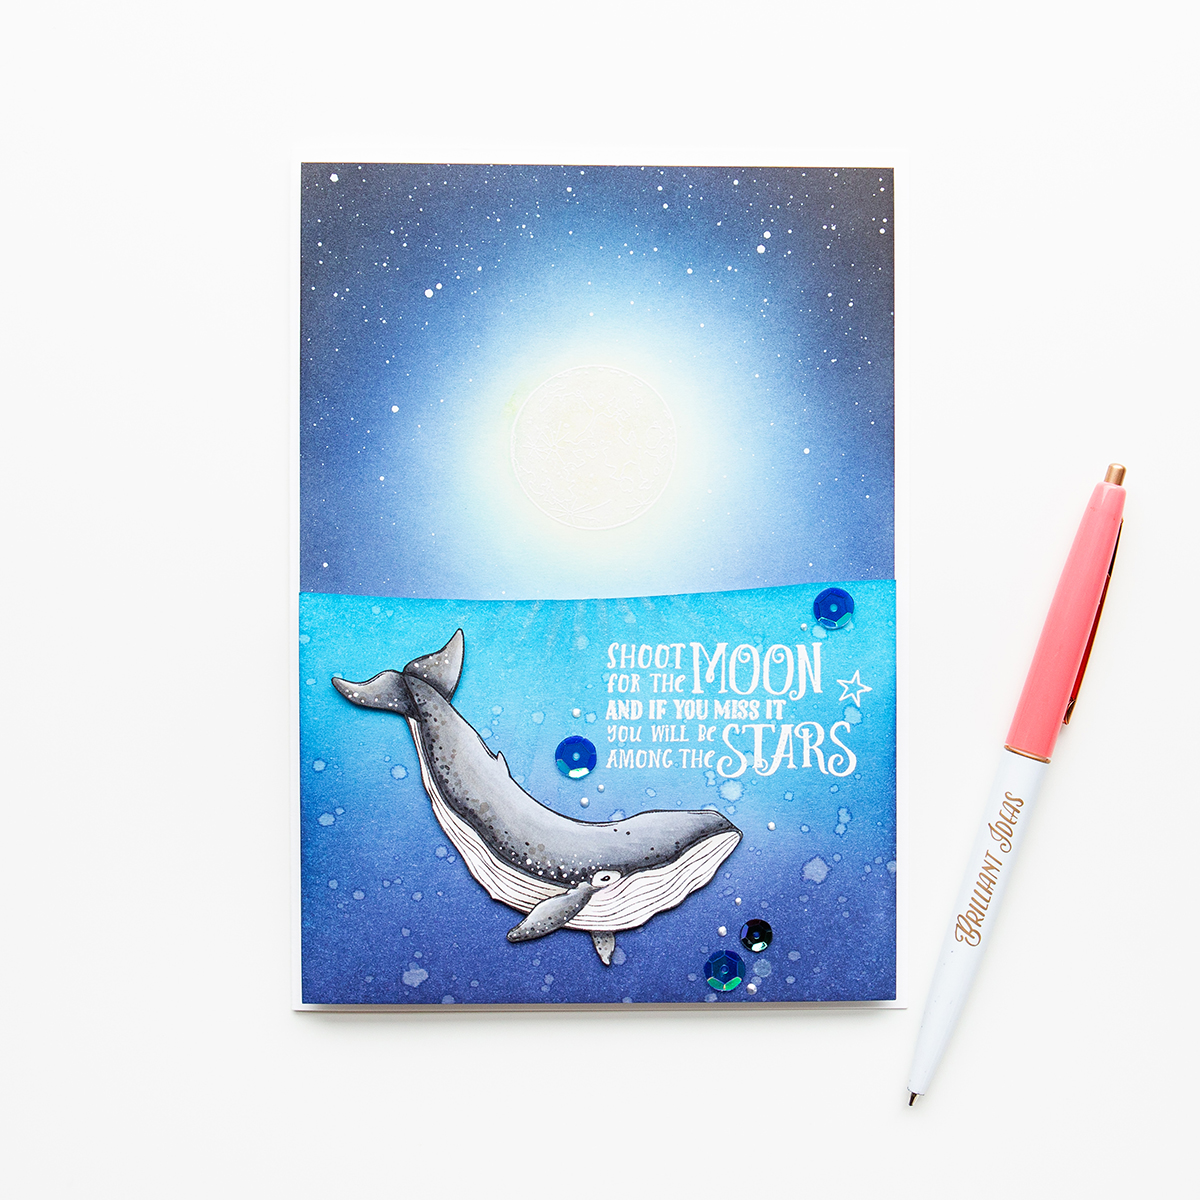
Today, I’m working with the Hello Summer Starry Night project kit, as well as a few other products from Spellbinders. The kit is packed with lots of great products to make cards for all occasions. They are gender neutral as well, so you could make cards for anyone using the kit. For my first card, I created a 5x7 sized card using the Dream Seeker stamp set.

Hello Summer Inspiration | Starry Night Cards with Jung AhSang

After I stamped the whale image on white cardstock, I colored it using Copic markers. I fussy cut around the whale without the white border. Next, I stamped and white heat embossed the moon image on another piece of white cardstock. I used Distress inks to blend a night sky around the moon. Then I added white ink splatters for stars. On another piece on white cardstock, I ink blended an ocean. I white heat embossed the sentiment, then started assembling my card. I trimmed the sky panel, and adhered it to a white card base using fun foam. Next I trimmed the ocean piece and adhered it to the sky panel using more fun foam. Finally, I adhered my whale using foam squares, and added some of the Starry Night Sequins. I created a little bit of tiny bubbles with some Liquid Pearls

Hello Summer Inspiration | Starry Night Cards with Jung AhSang

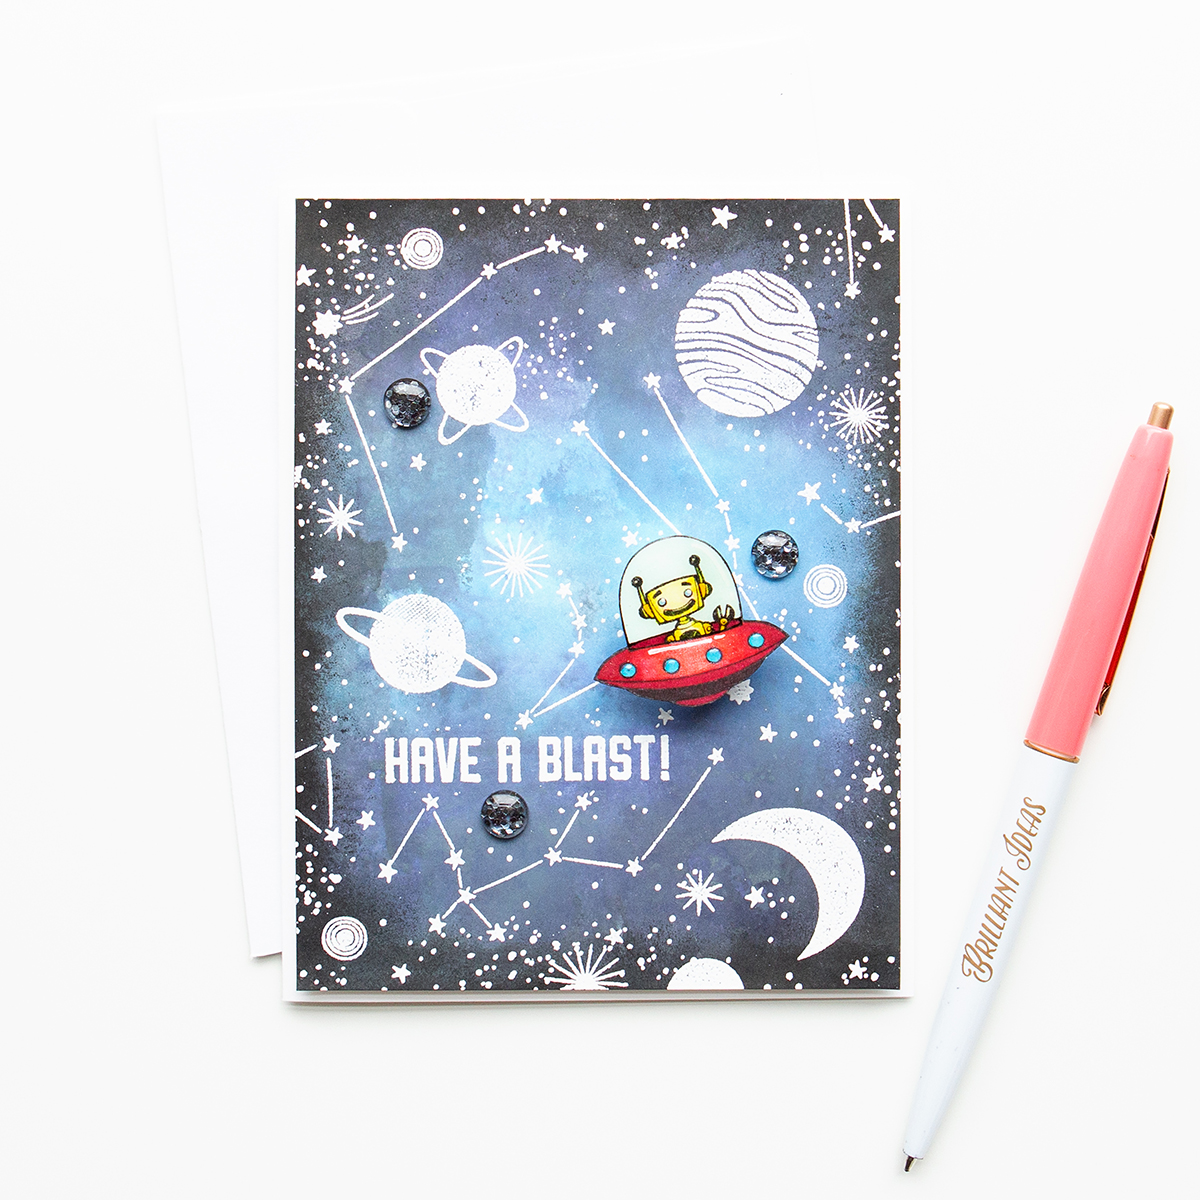
For my next card, I created a fun, interactive galaxy card.

Hello Summer Inspiration | Starry Night Cards with Jung AhSang

I used some Distress Oxide inks to ink blend a blue and black background on a panel cut slightly smaller the A2 sized. Since distress oxide inks have a sort of chalky finish, I wanted to add more black color to the edges, so I used the FSJ Black Licorice Silk and a foam blending tool to deepen the edges of the card panel. Once completely dry, I used the Space Cadet stamp set to white heat emboss the “Have a Blast!” sentiment. I then masked the sentiment off, and stamped the Space Galaxy Background stamp, and white heat embossed to create a beautiful galaxy image. On a scrap piece of cardstock, I masked and stamped a couple images from the same Space Cadet stamp set to create a little robot in a spaceship. I colored in the image with Copic markers, and fussy cut it out. I added some glossy accents to the glass portion of the spaceship. I adhered the galaxy panel to a white A2 sized card base, then attached the robot spaceship with an action wobbler. To finish off my card, I added 3 of the FSJ Space Glow glitter pieces.

Hello Summer Inspiration | Starry Night Cards with Jung AhSang

For my third card, I made a pretty shaker card.

Hello Summer Inspiration | Starry Night Cards with Jung AhSang

I started by creating the back portion of my shaker card. I ink blended a few colors using Distress Oxide ink on a white card base. Once dry, I used some glimmer paste and the Starbrite stencil to create a glittery star background. While that was drying, I worked on the front panel. Using a piece of pink cardstock, trimmed slightly smaller than A2 sized, I added some ink blending to the bottom, using another pink Distress oxide ink, just for a little color variation. I added some water sprinkles to the inked portion, creating some bleached splatters. I also used the FSJ Black Licorice Silk to create more ink splatters. I stamped the sentiment from the Dream Seeker Stamp set, then heat embossed with silver embossing powder. I used a Spellbinders circle die to cut out a circle directly above the sentiment.

Hello Summer Inspiration | Starry Night Cards with Jung AhSang

On the back of the panel, I adhered clear acetate, and added 2 layers of foam tape. I used the Starry Night Sequins, and adhered the star background to create the shaker element. To finish off my card, I added a few more sequins to the front card panel.

Spellbinders Supplies:

Other Supplies

Cardstock, Distress Inks in Squeezed Lemonade, Salty Ocean, Chipped Sapphire, Mermaid Lagoon, and Black Soot, Distress Oxide inks in Spun Sugar, Picked Raspberry, Black Soot, Chipped Sapphire and Tumbled Glass, Versamark Ink, Ranger superfine White Embossing Powder, Gina K Amalgom ink, Copic Markers, Nuvo Glimmer Paste, Liquid Pearls in White Opal, Dr. Ph Martin’s Pen White, Ranger Glossy Accents, Spectrum Noir Sparkle Pen, Fun Foam, Foam Squares, Action Wobble
Hello Summer Inspiration | Starry Night Cards with Jung AhSang

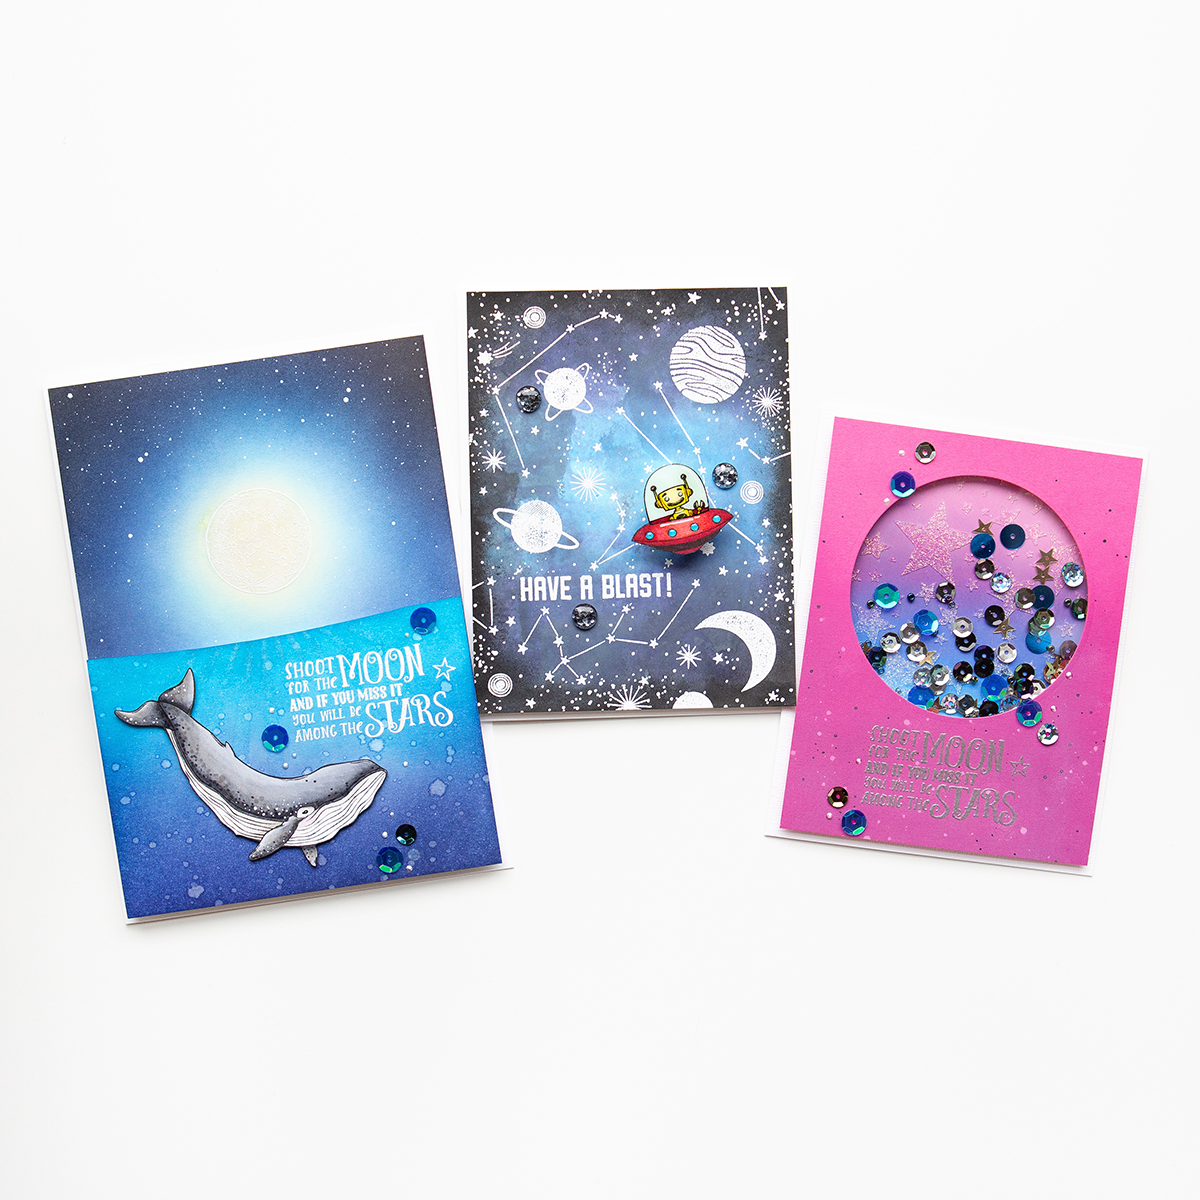
I am thrilled with how my cards have turned out! I love them all for different reasons! I have loved working with Spellbinders Hello Summer Starry Night project kit, and I hope I have inspired you to get crafty. Thank you so much for stopping by, and have a lovely day!

Hello Summer Inspiration | Starry Night Cards with Jung AhSang

5 comments

The whale stamp reminds me of trip to cape cod!

Daniel Yinger,

This collection is awesome!

Kathy Montoya,

This collection is awesome!!

Kathy Montoya,

The starry night card supplies are great!
I would love to craft with them.

Carlethia McCollum,

That Whale Card is Stunning!

Donna,

Leave a comment

Please note, comments need to be approved before they are published.


  • Spellbinders Beginners Blog Post Series - Common Cardmaking Mistakes (and How to Fix Them)

    Beginner’s Guide to Cardmaking

    Common Cardmaking Mistakes and How to Fix Them: A Beginner's Guide

    Mistakes happen to every cardmaker, from beginners to experienced crafters. This comprehensive guide shares practical solutions for fixing common cardmaking mistakes, including stamping, die cutting, foiling, BetterPress, ink blending, stenciling, coloring, heat embossing, and more, so you can confidently rescue your handmade cards instead of starting over.

  • How to make a Polar Bear Christmas Card with Alcohol Markers, HUR93909, S7-291, S5-619

    CS-8-100

    How to make a Polar Bear Christmas Card with Alcohol Markers

    Hello, cardmaking friends! It’s Mona Tóth here, and I’m so happy to be back on the Spellbinders blog. Today, I’m sharing a Christmas step-by-step card tutorial featuring the Polar Friends Stamp and Die Set by Simon Hurley. This card was inspired by the Christmas advertisements I remember seeing on television when I was a child in the 1990s. They often featured polar bears surrounded by...

  • Interactive Scrapbook Layout Using the Turn the Page Collection by Esther Glas, SCSP-037, SCSE-054, SCSE-039, SCSR-016, E3D-186, STP-279, SDS-232, S2-473, S7-298, S7-295

    E3D-186

    Interactive Scrapbook Layout Using the Turn the Page Collection by Esther Glas

    Hello, crafty friend! I’m Adrienne Boese, better known online as Alice Scraps Wonderland. I love a good interactive scrapbook page! It can be something as simple as a pocket or something more intricate like a waterfall mechanism or flips. Today, we are going to focus on one of those simple techniques - a pocket!  It’s the perfect technique to dip your toes into the interactive...