

Posted by Spellbinders Team
on July 03, 2017

Hi everyone, Alli Roth here from Partyography! Today I’m sharing a really easy invite that’s kid friendly and perfectly on trend with all the unicorn parties that are popular right now. If your kids or grandkids are anything like my nieces, they love to be involved with every project. I love these watercolor unicorn invites because they’re so easy, your kids can be involved throughout the whole process!
 Instructions:
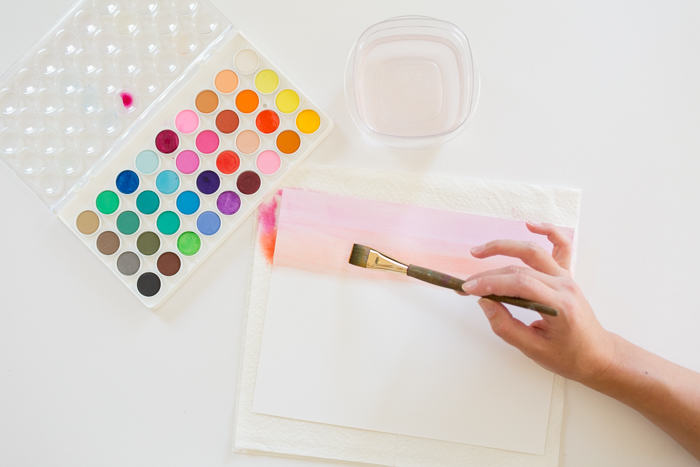 Start by watercoloring a piece of 8.5″x11″ piece of white cardstock. You’ll need a piece of watercolor cardstock for every two invites. This was my first time using watercolor paint (as an adult) so don’t be intimidated! I wanted the paper to have a rainbow effect so I just layered various colors and covered the whole paper. This is definitely a step you can get the kids involved with, no perfection is needed here!

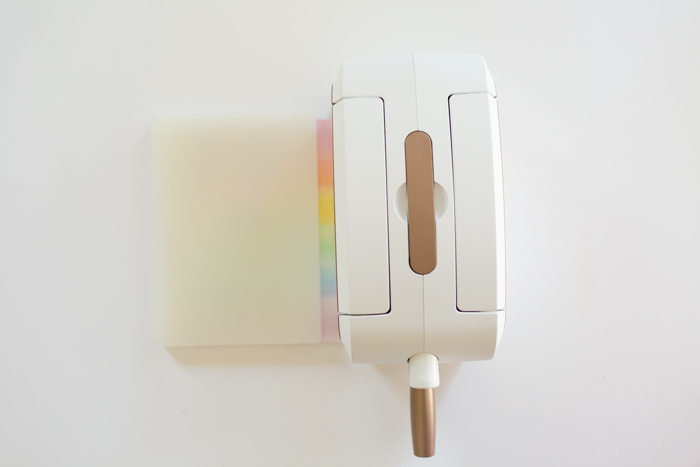 The paper will curl up as it dries but don’t worry, you can use your PE-100 Platinum™ Die Cutting and Embossing Machine and magnetic platform to flatten it out. You could also use books or anything else you have on hand.
 While the paper is flattening, you can cut out a unicorn for each invite using the S3-259 Die D-Lites Unicorn Fantasy Etched Dies on gold glitter cardstock. You can also cut various size stars using the stars from S4-784 Shapeabilities Rise ‘n Shine Etched Dies.
 Once the watercolor paper is flat you’ll want to print out your invites. Use any program you like to print out the details of the party. Make sure to do a test run of your invite on plain paper before printing onto the watercolor paper.
 Cut out the watercolor paper so they’re 4.5 inches by 6.5 inches. This way, there is still a border when you glue it to the background paper that is 5 inches by 7 inches.
 The final step is to glue everything into place and use a square adhesive to attach the unicorn.


 These invites are so easy and fun to make, you can invite all your friends to come be magical unicorns for the day! For more ideas and inspiration, visit: Partyography By Alli.
Spellbinders® Supplies:
These invites are so easy and fun to make, you can invite all your friends to come be magical unicorns for the day! For more ideas and inspiration, visit: Partyography By Alli.
Spellbinders® Supplies:
Start by watercoloring a piece of 8.5″x11″ piece of white cardstock. You’ll need a piece of watercolor cardstock for every two invites. This was my first time using watercolor paint (as an adult) so don’t be intimidated! I wanted the paper to have a rainbow effect so I just layered various colors and covered the whole paper. This is definitely a step you can get the kids involved with, no perfection is needed here!
The paper will curl up as it dries but don’t worry, you can use your PE-100 Platinum™ Die Cutting and Embossing Machine and magnetic platform to flatten it out. You could also use books or anything else you have on hand.
While the paper is flattening, you can cut out a unicorn for each invite using the S3-259 Die D-Lites Unicorn Fantasy Etched Dies on gold glitter cardstock. You can also cut various size stars using the stars from S4-784 Shapeabilities Rise ‘n Shine Etched Dies.
Once the watercolor paper is flat you’ll want to print out your invites. Use any program you like to print out the details of the party. Make sure to do a test run of your invite on plain paper before printing onto the watercolor paper.
Cut out the watercolor paper so they’re 4.5 inches by 6.5 inches. This way, there is still a border when you glue it to the background paper that is 5 inches by 7 inches.
The final step is to glue everything into place and use a square adhesive to attach the unicorn.
These invites are so easy and fun to make, you can invite all your friends to come be magical unicorns for the day! For more ideas and inspiration, visit: Partyography By Alli.
Spellbinders® Supplies:
- S4-784 Shapeabilities Rise ‘n Shine Etched Dies
- S3-259 Die D-Lites Unicorn Fantasy Etched Dies
- PE-100 Platinum™ Die Cutting and Embossing Machine
- Cardstock (white, gold glitter, pink glitter)
- Watercolor paint & water
- Paintbrush
- Scissors
- Computer/Printer
- Glue
- Square adhesives























































































